FROM COCOAPODS TO THE SWIFT PACKAGE MANAGER
10/4/20
For several of my iOS apps that needed Dropbox capabilities, I’ve used CocoaPods to let me use the SwiftyDropbox framework. CocoaPods offered a great way to incorporate external frameworks, but I wasn’t a big fan. Updates were done by the command-line, and every new Swift release made the whole thing seem fragile. When I saw that SwiftyDropbox was now available in the Swift Package Manager, I knew it was time to switch.
Removing CocoaPods
The first step is to remove CocoaPods from your app. Tibor Bödecs shows one way to remove CocoaPods, using the deintegrate plugin. It may work well, but I want to move away from CocoaPods, not go deeper by installing a new plugin. I wanted to remove CocoaPods manually from my app. It isn’t hard, and you just have to know where to find the various parts.
Phase one of removing CocoaPods is to clean the app from inside Xcode. First, go to your app target, click on the Build Phases tab, and look for the lines [CP] Check Pods Manifest.lock and [CP] Embed Pods Framework. Click the small x to the right of each to remove them. If you have a test target, delete the same two lines from Build Phases tab for the test target.

Next, in the Navigator area, select the folder Pods and expand it to see all of the installed pods. In my app, I had debug, release, and distribution versions of my app target and my test target. While the Pods folder is selected, press delete. When Xcode asks if you want to delete the links or move this to the trash, choose move it to the trash.

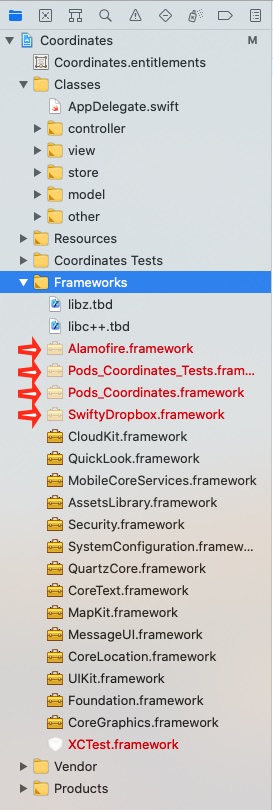
Now expand the Frameworks folder. For SwiftyDropbox, there are four frameworks you will need to delete: Alamofire, SwiftyDropbox, Pods_Coordinates, and Pods_Coordinates_Tests. For your app, the last two frameworks will correspond to your app name. If you are removing CocoaPods other than SwiftyDropbox, you will want to their frameworks from this list.
Select each of the CocoaPods frameworks, and press delete. When Xcode asks if you want to delete the links or move this to the trash, choose move it to the trash.
Phase two of removing CocoaPods takes place in the Finder. In your app directory, there are four files and folders you want to delete. First, the .xcworkspace file will no longer be needed; delete it, and use the .xcodeproj as you normally would to open the project in Xcode. Second, delete Podfile and Podfile.lock. Third, delete the Pods folder if it is still there.

Last, go to ~/Library/Developer/Xcode/DerivedData and delete the folder beginning with your app’s name. CocoaPods is now completely removed from your app.
Using the Swift Package Manager
You can now add SwiftyDropbox (or whatever package you are using) through the Swift Package Manager. Open your app in Xcode, and go to File … Swift Packages … Add Package Dependency

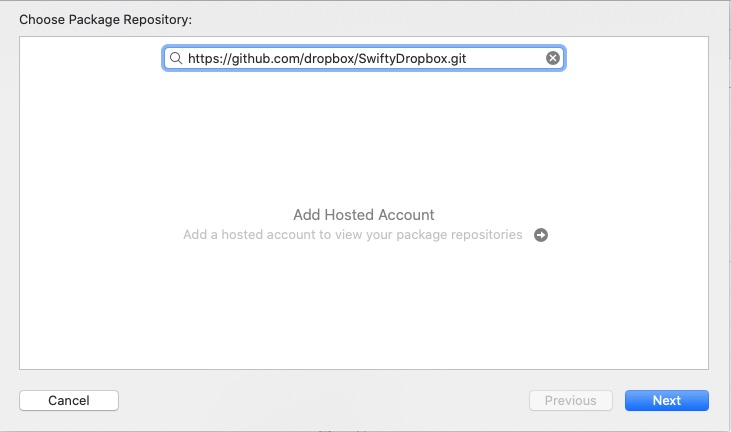
In the dialog that opens, enter the url for the git repository for your package. For SwiftyDropbox, it is https://github.com/dropbox/SwiftyDropbox.git. Click Next.
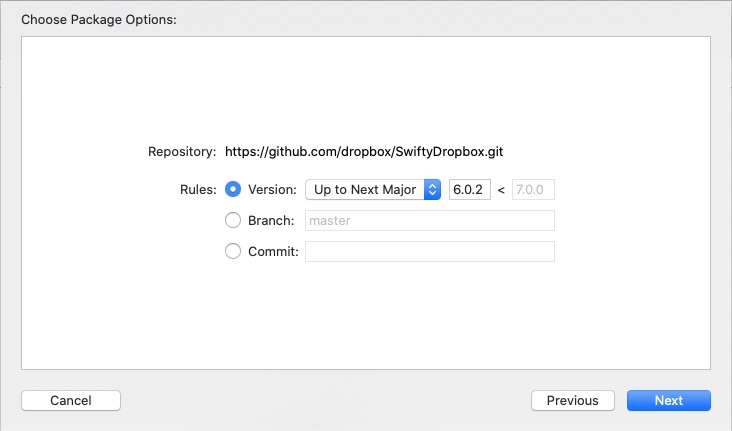
The next dialog will show you which version to install. I accepted the defaults, but depending on your package and your needs, you can specify the version, branch, and commit. Click Next.
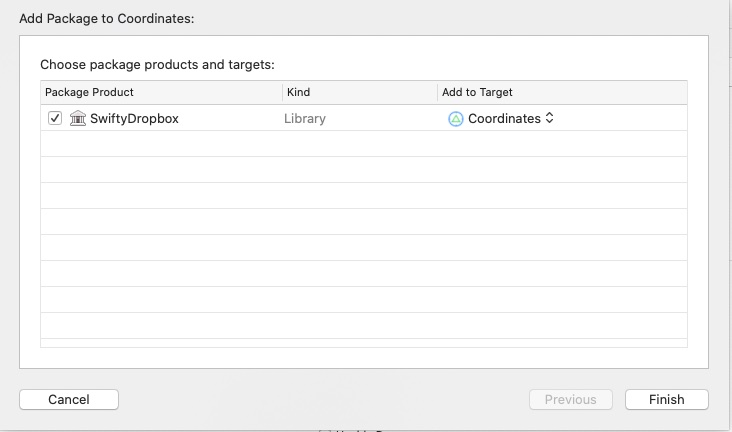
The final dialog will show which packages can be adde to your targets. Make sure SwiftyDropox is checked, and make sure your app is listed as the target. Click Finish.
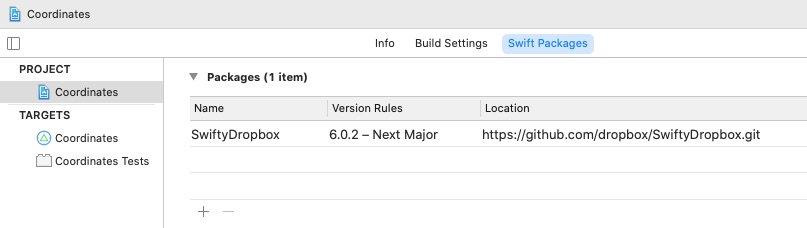
When it is done, clicking on your project, then on the Swift Packages tab should show that the SwiftyDropbox package is installed, and it will display the version you chose and the URL you used. You can now Build and Run your app. That’s it.
This is remarkably cleaner and simpler than the CocoaPods installation. I like it already!