TAKING PHOTOS FOR SCIENCE
5/19/22
A few simple guidelines can improve your photos, especially when you plan to use them in an article or talk.
Move in close
Fill as much of the available image space with your subject. Where possible, do this by moving closer to your subject. Where this isn’t possible, use the optical zoom feature on your camera, but avoid the digital zoom feature, as it can create blurriness. Check online to see how to use the optical zoom but not the digital zoom for your particular camera.
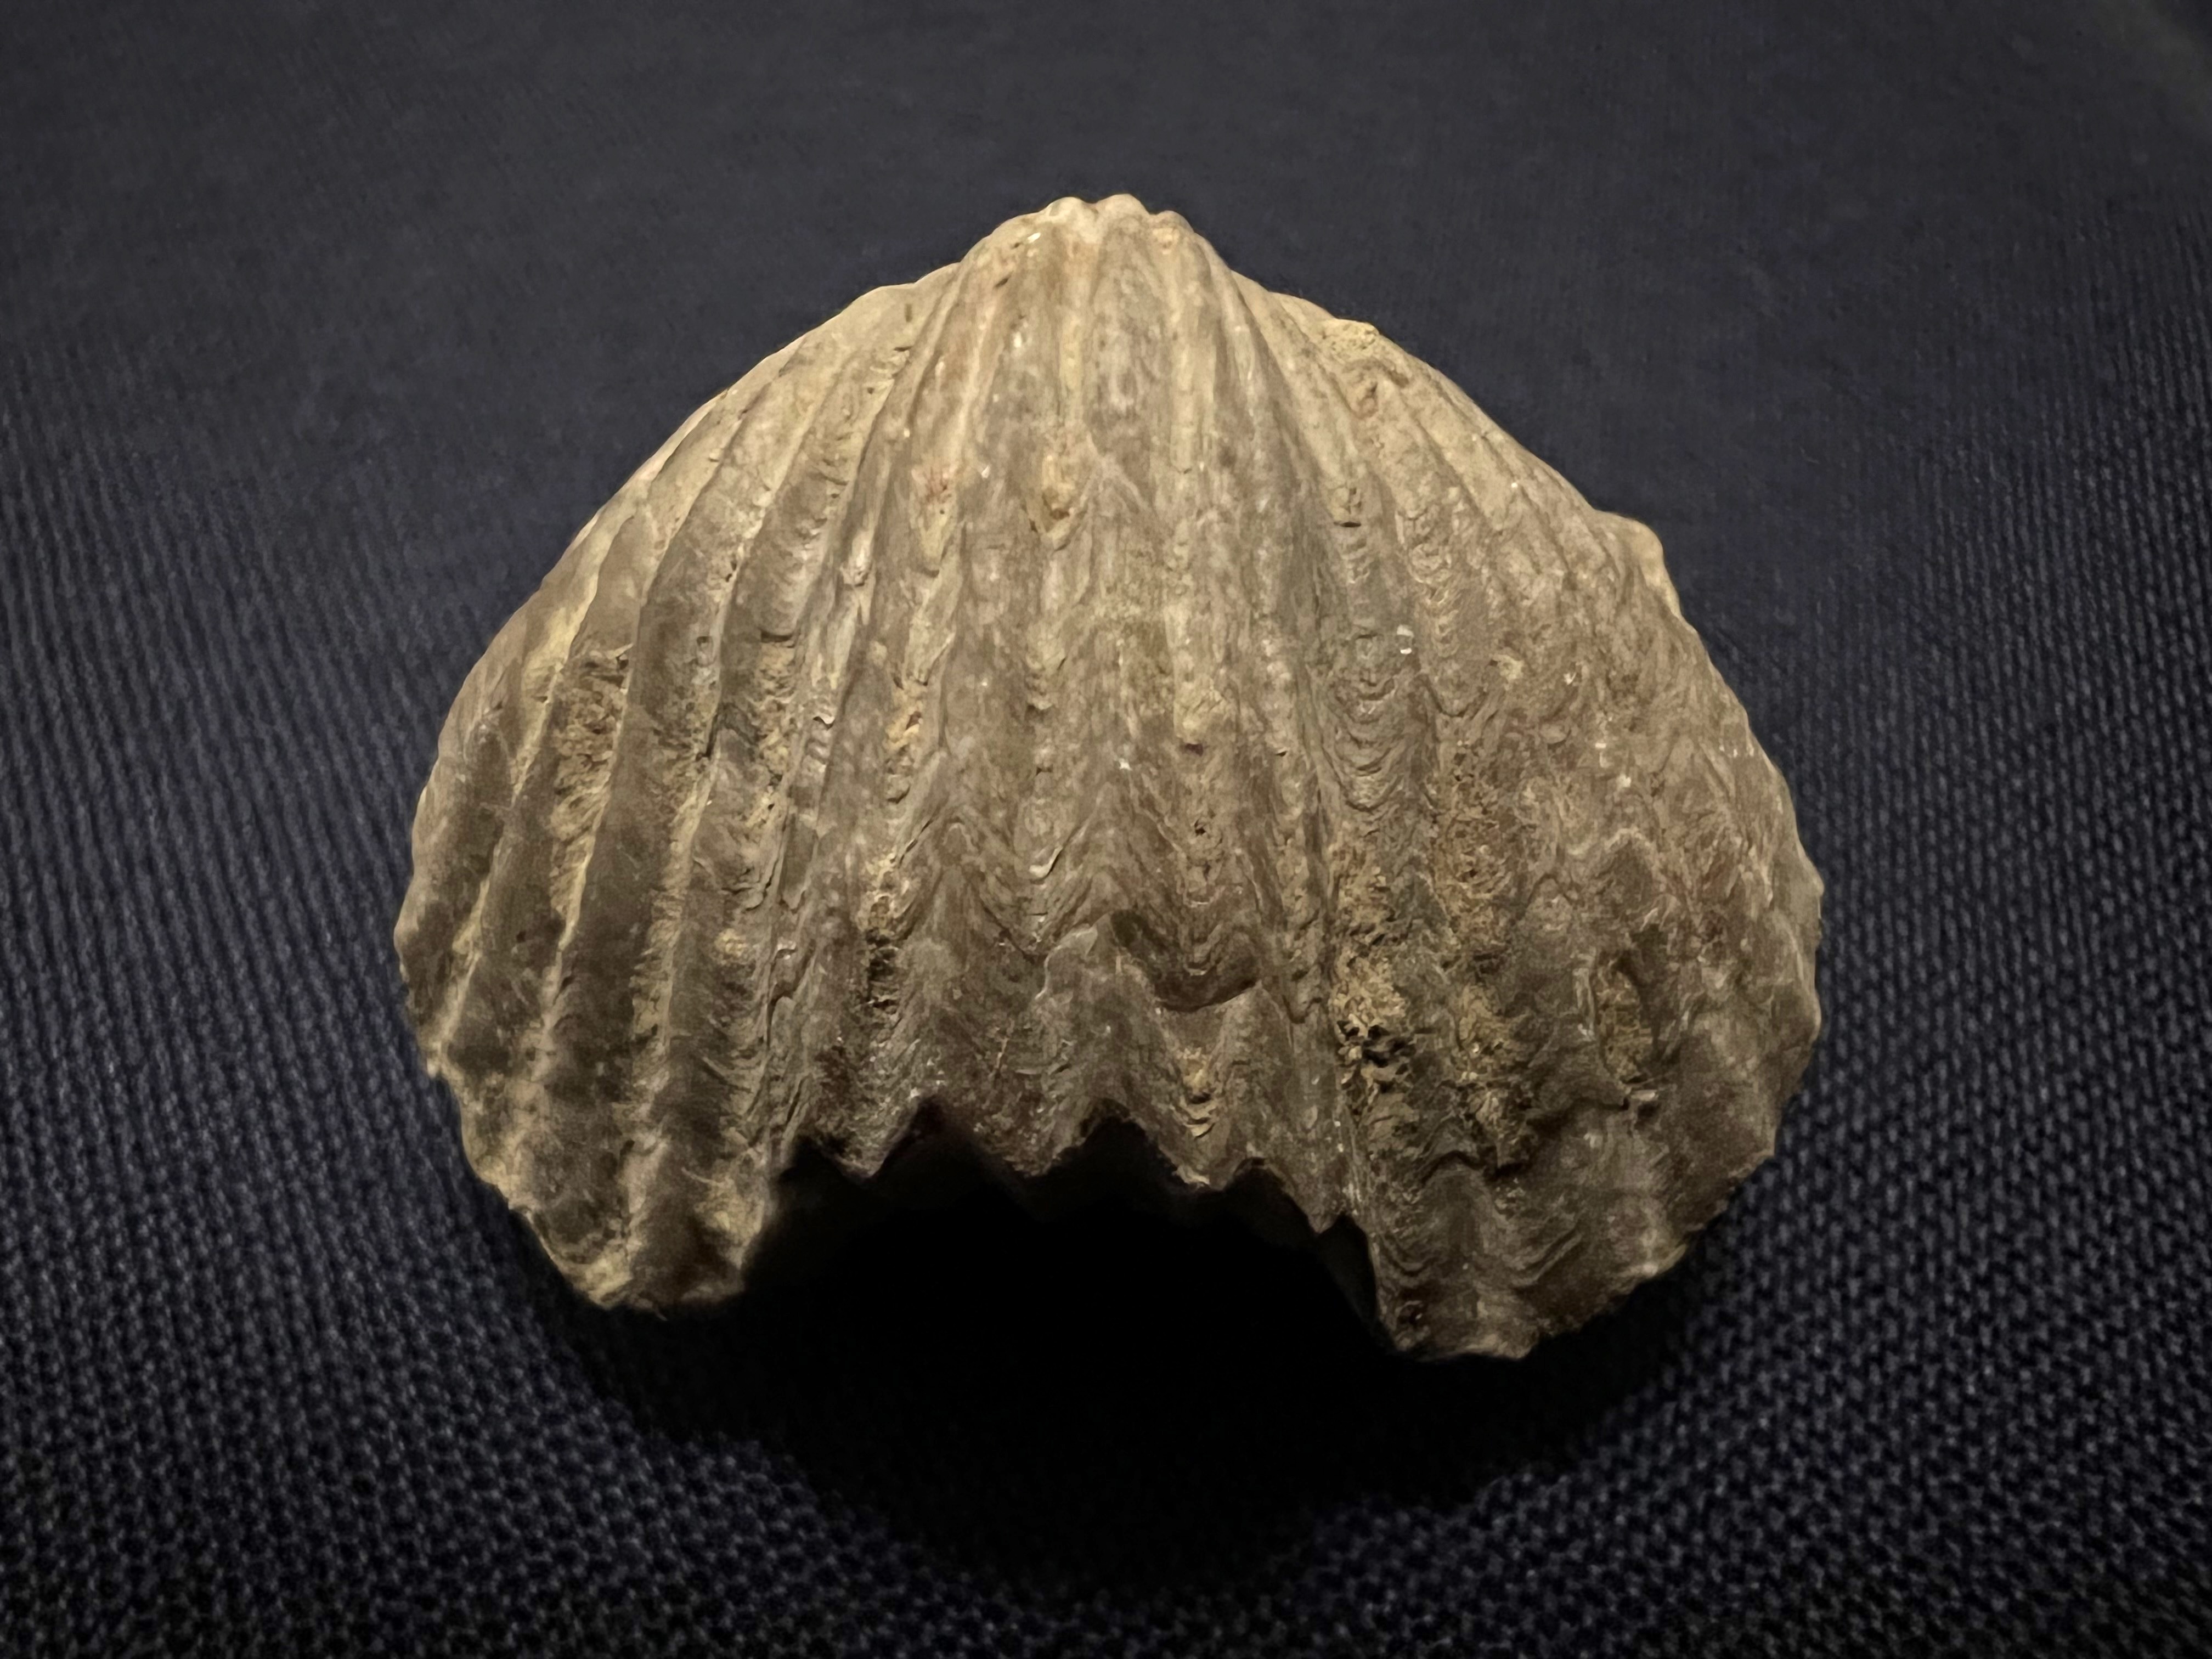
This first photo was taken close to the subject. It fills a large proportion of the image as a result, and it captures fine detail.
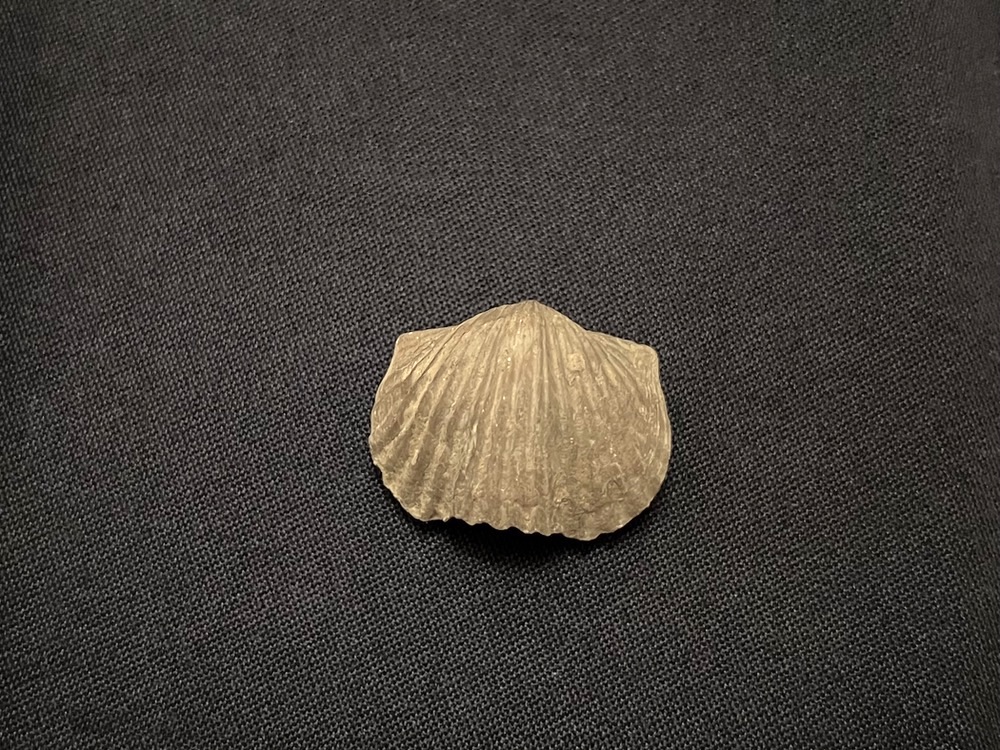
This second photo was taken too far from the subject. As a result, the subject occupies a small portion of the image, and it lacks detail. Cropping can fix the first problem (the proportion of the image), but it will not improve the detail that is captured.
But not too close
Avoid getting too close with your camera, which can cause blurriness owing to the limited depth of field. In extreme cases, you may be too close for your camera to focus. For many cell-phone camera, approximately 10 cm (about the width of your palm) is the focusing limit. More recent iPhone cameras have greatly shortened this distance.
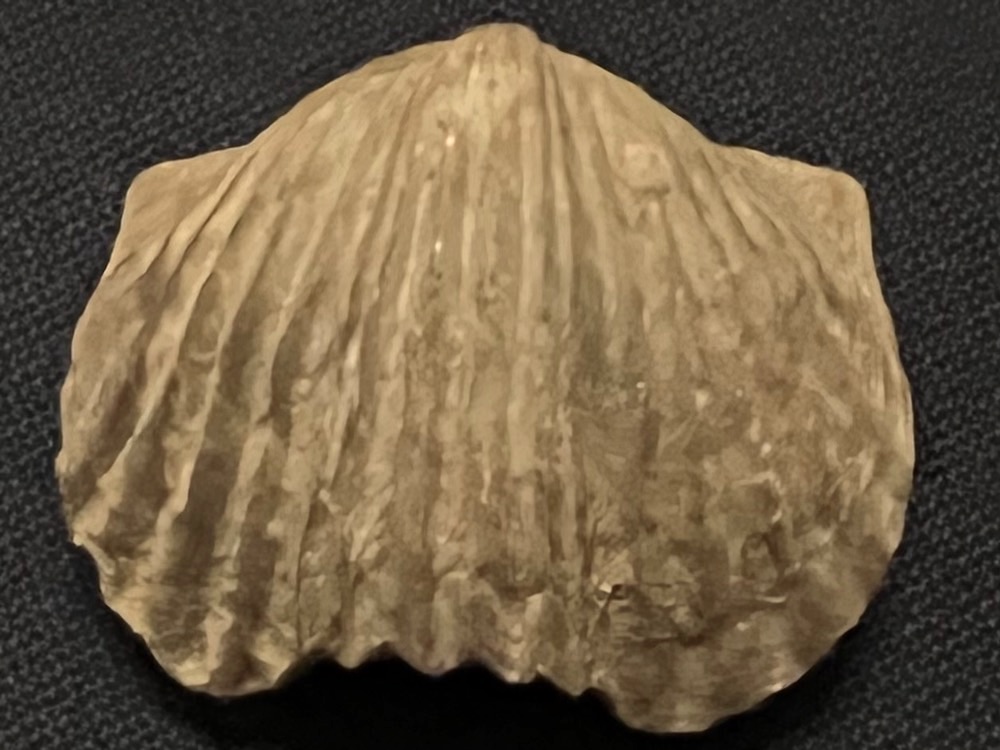
This photo was taken far too close to the subject. Notice how many of the details are blurry as a result.
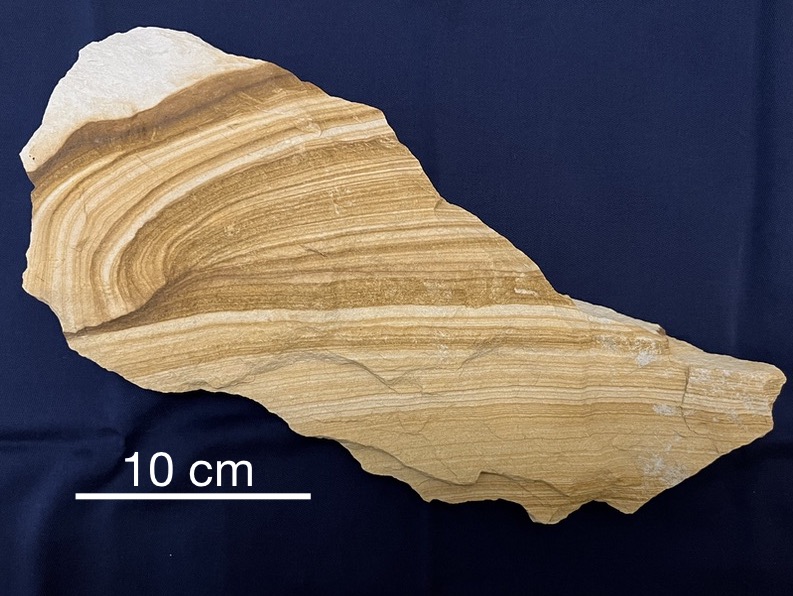
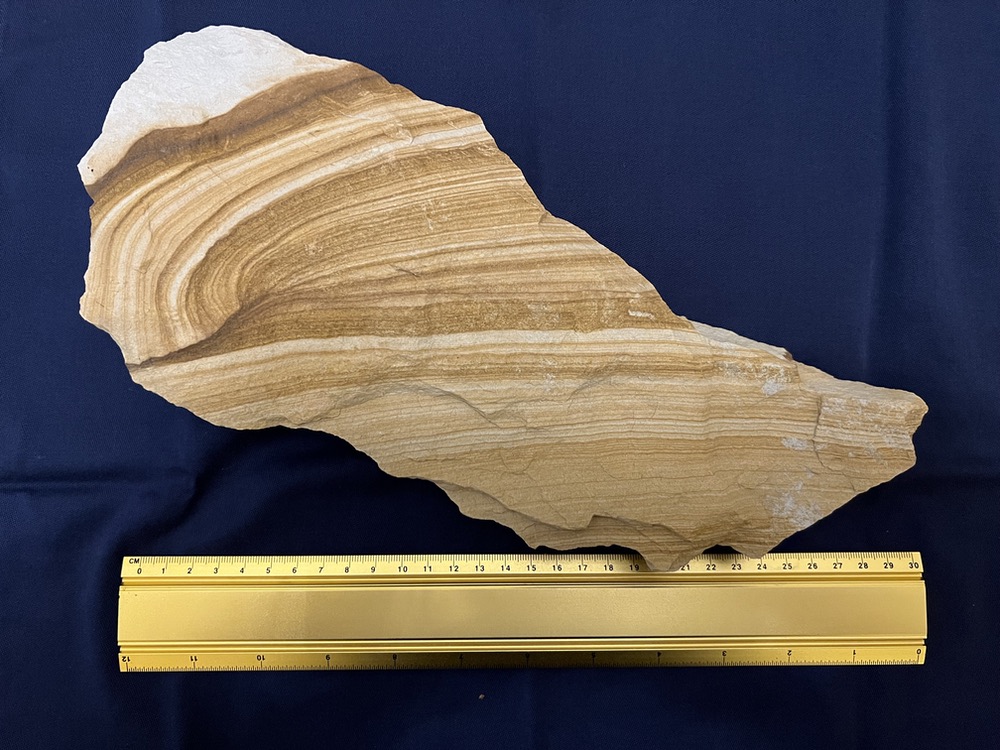
Add a scale to the side
Include a metric-system ruler in your photo, but keep it some distance from the subject, near the edge of the photo. Avoid using objects like pens and coins as scales.
Here, a metric ruler is placed at a good distance.
In Photoshop, you will build the final image by using the ruler to create an accurate scale bar, place it close to the subject, then crop out the ruler.
In this photo, the ruler is too close to the subject, and it will be difficult to remove for publication.
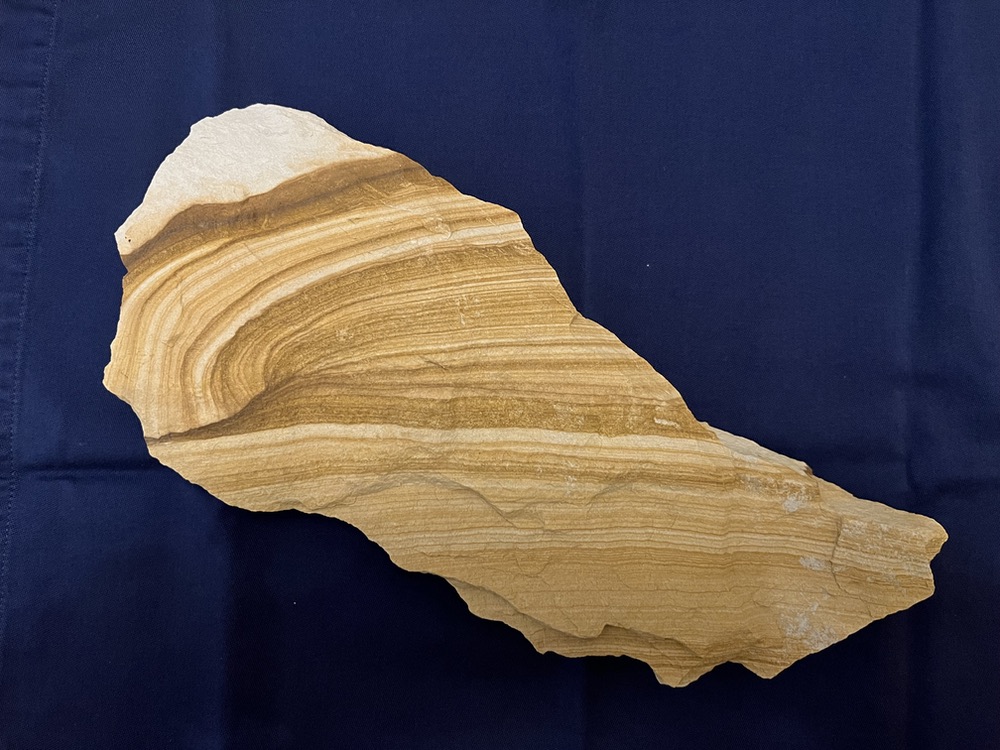
Choose an appropriate orientation
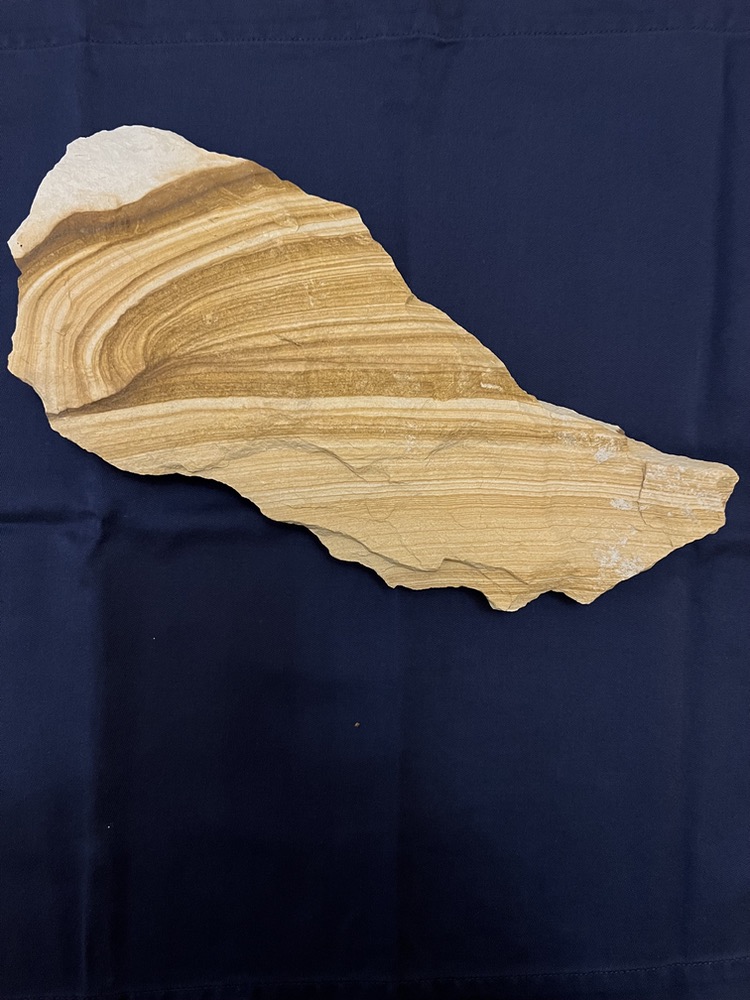
Make the orientation of your photo match your subject. If your subject is wider than tall, take the photo in a landscape (wide) orientation. If the subject is taller than it is wide, take the photo in a portrait (tall) orientation.
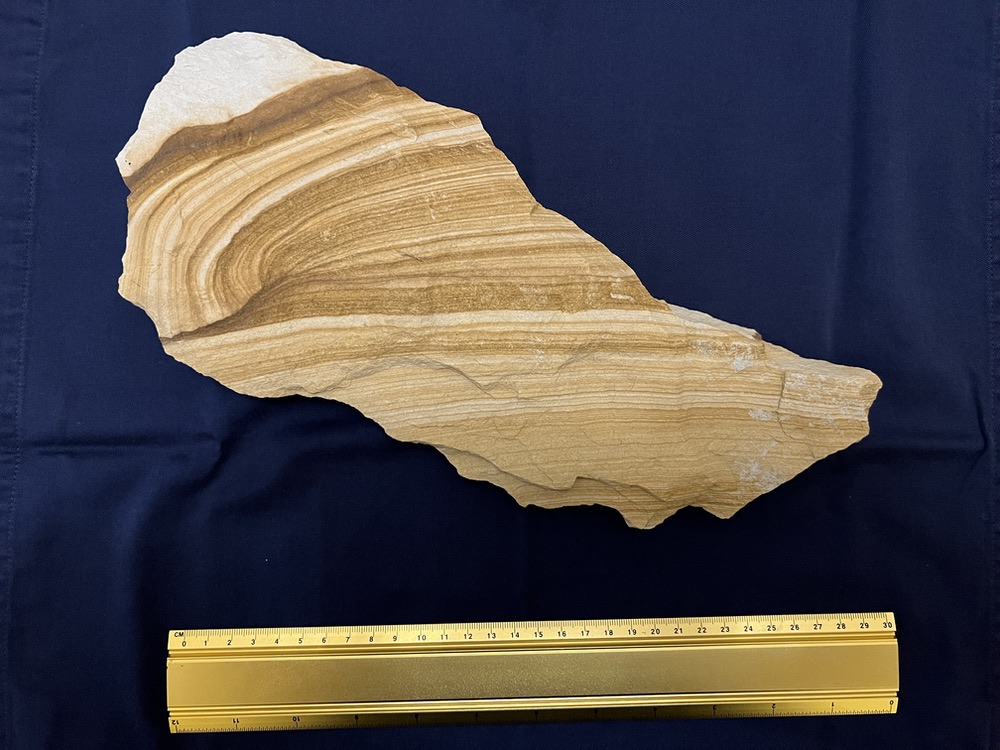
This rock is wide, so a landscape orientation allows the subject to fill the photo.
Taking the photo in portrait orientation causes large areas of the photo to be unusable. Cropping can partly fix this, but it will not add the detail that would have been present if the subject filled the photo.
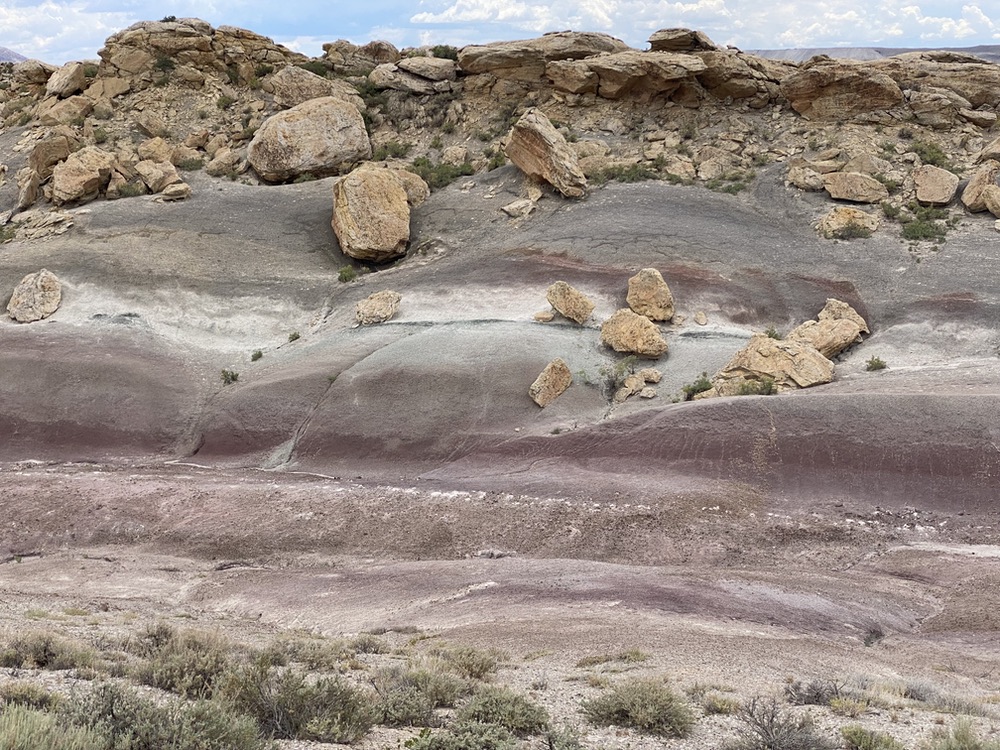
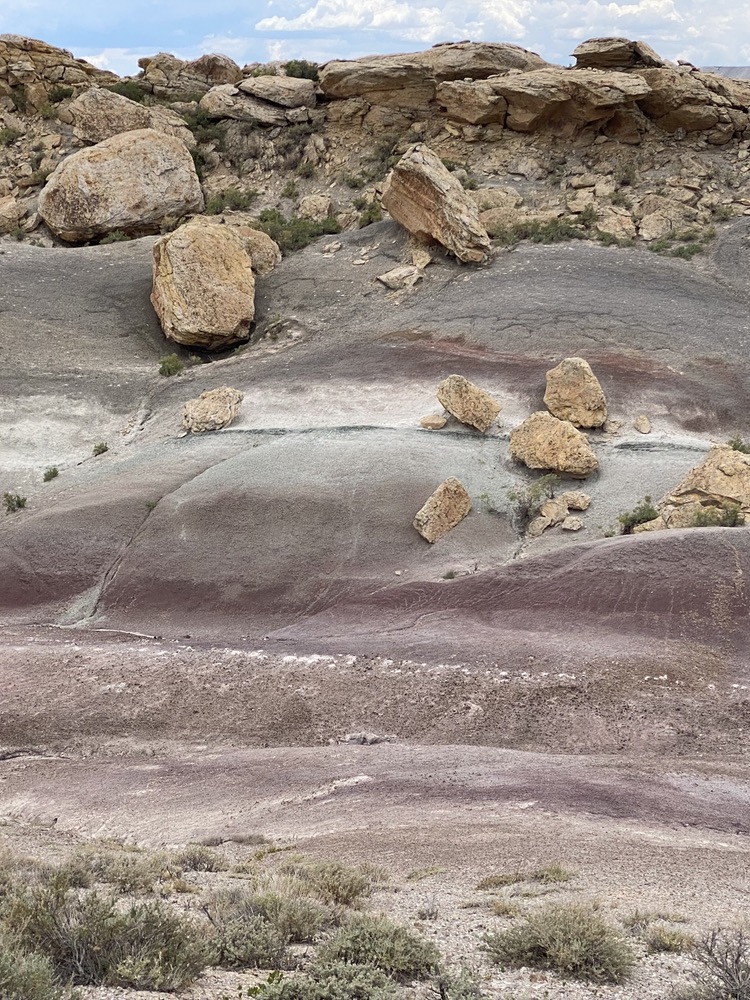
In other cases, make the orientation match what you are trying to capture.
For example, a landscape orientation emphasizes the lateral variation in these sedimentary rocks.
A portrait orientation puts more emphasis on the vertical succession.
For scenery photos, take some photographs in landscape orientation as they better fit the landscape format of slides.