LOGIC PRO IPAD STARTER GUIDE
4/26/25
I had trouble understanding how to connect a guitar to Logic Pro on the iPad, and all the tutorials seemed too long. After some experimentation, I discovered that it isn’t hard. Here’s how.
Connect everything
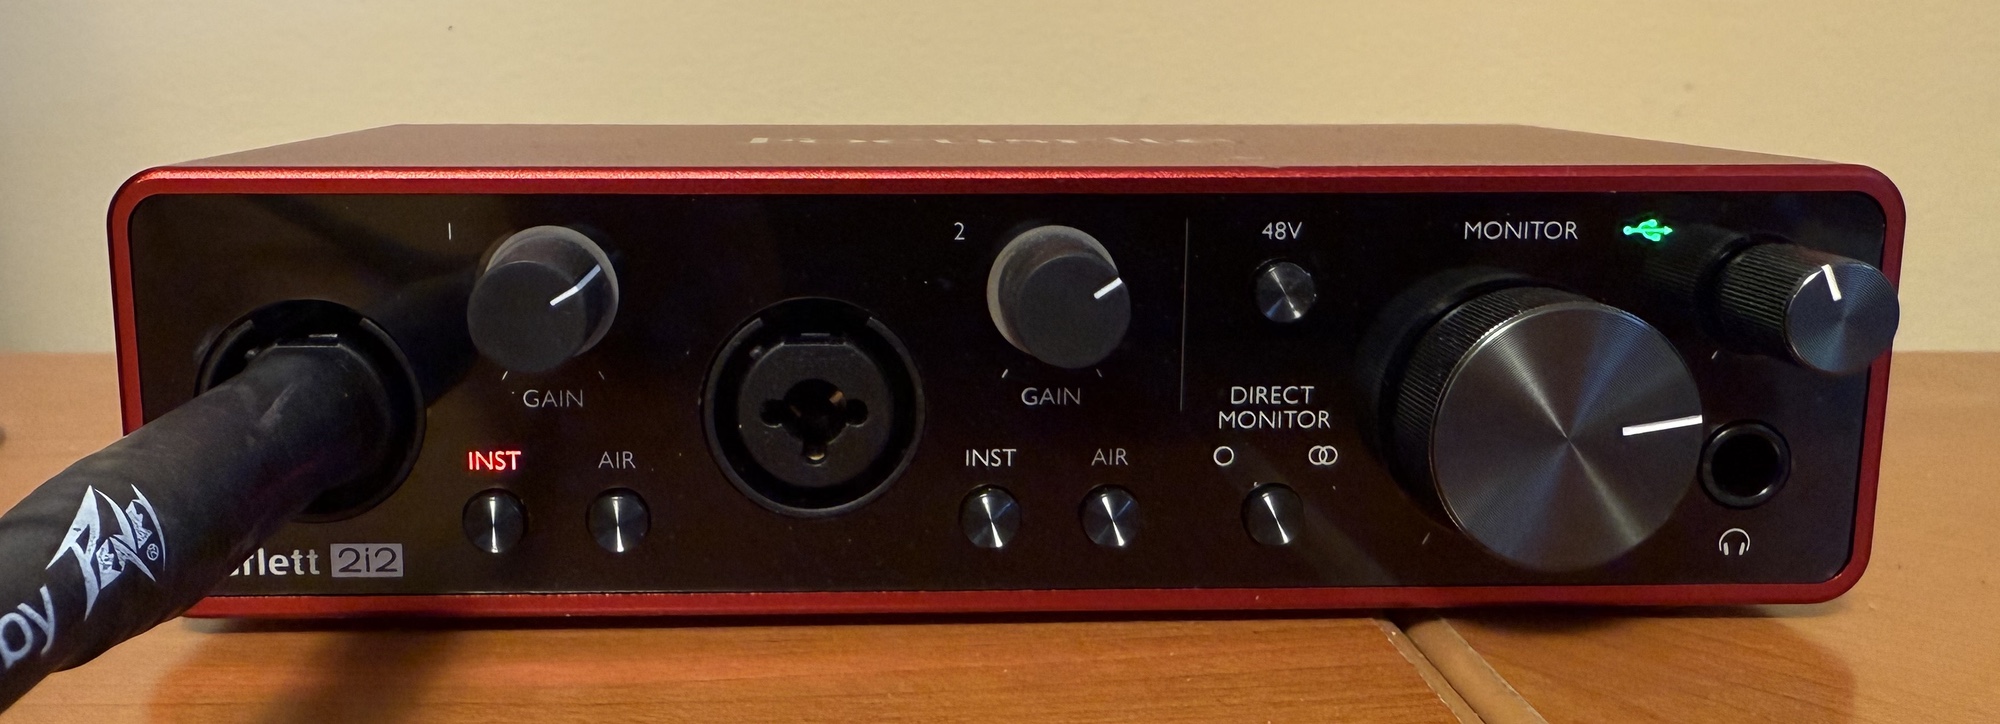
Connect your audio interface to your iPad with a USB-C cable, and connect your audio interface to your monitors. I use a Focusrite Scarlet 2i2 audio interface and KRK Rokit 5 monitors; both are great. Use a ¼" instrument cable to connect your guitar to your audio interface, and adjust the input level so that it stays green (doesn’t clip). On the Scarlet, press the INST button next to the instrument cable so that it glows, and turn off the direct monitor buttons so that they are not glowing. As you play, adjust the overall volume of the speakers with the large knob below MONITOR. The Scarlet should look like this, with only the INST (red) and USB (green) lights glowing:
Basic Logic Pro instrument setup
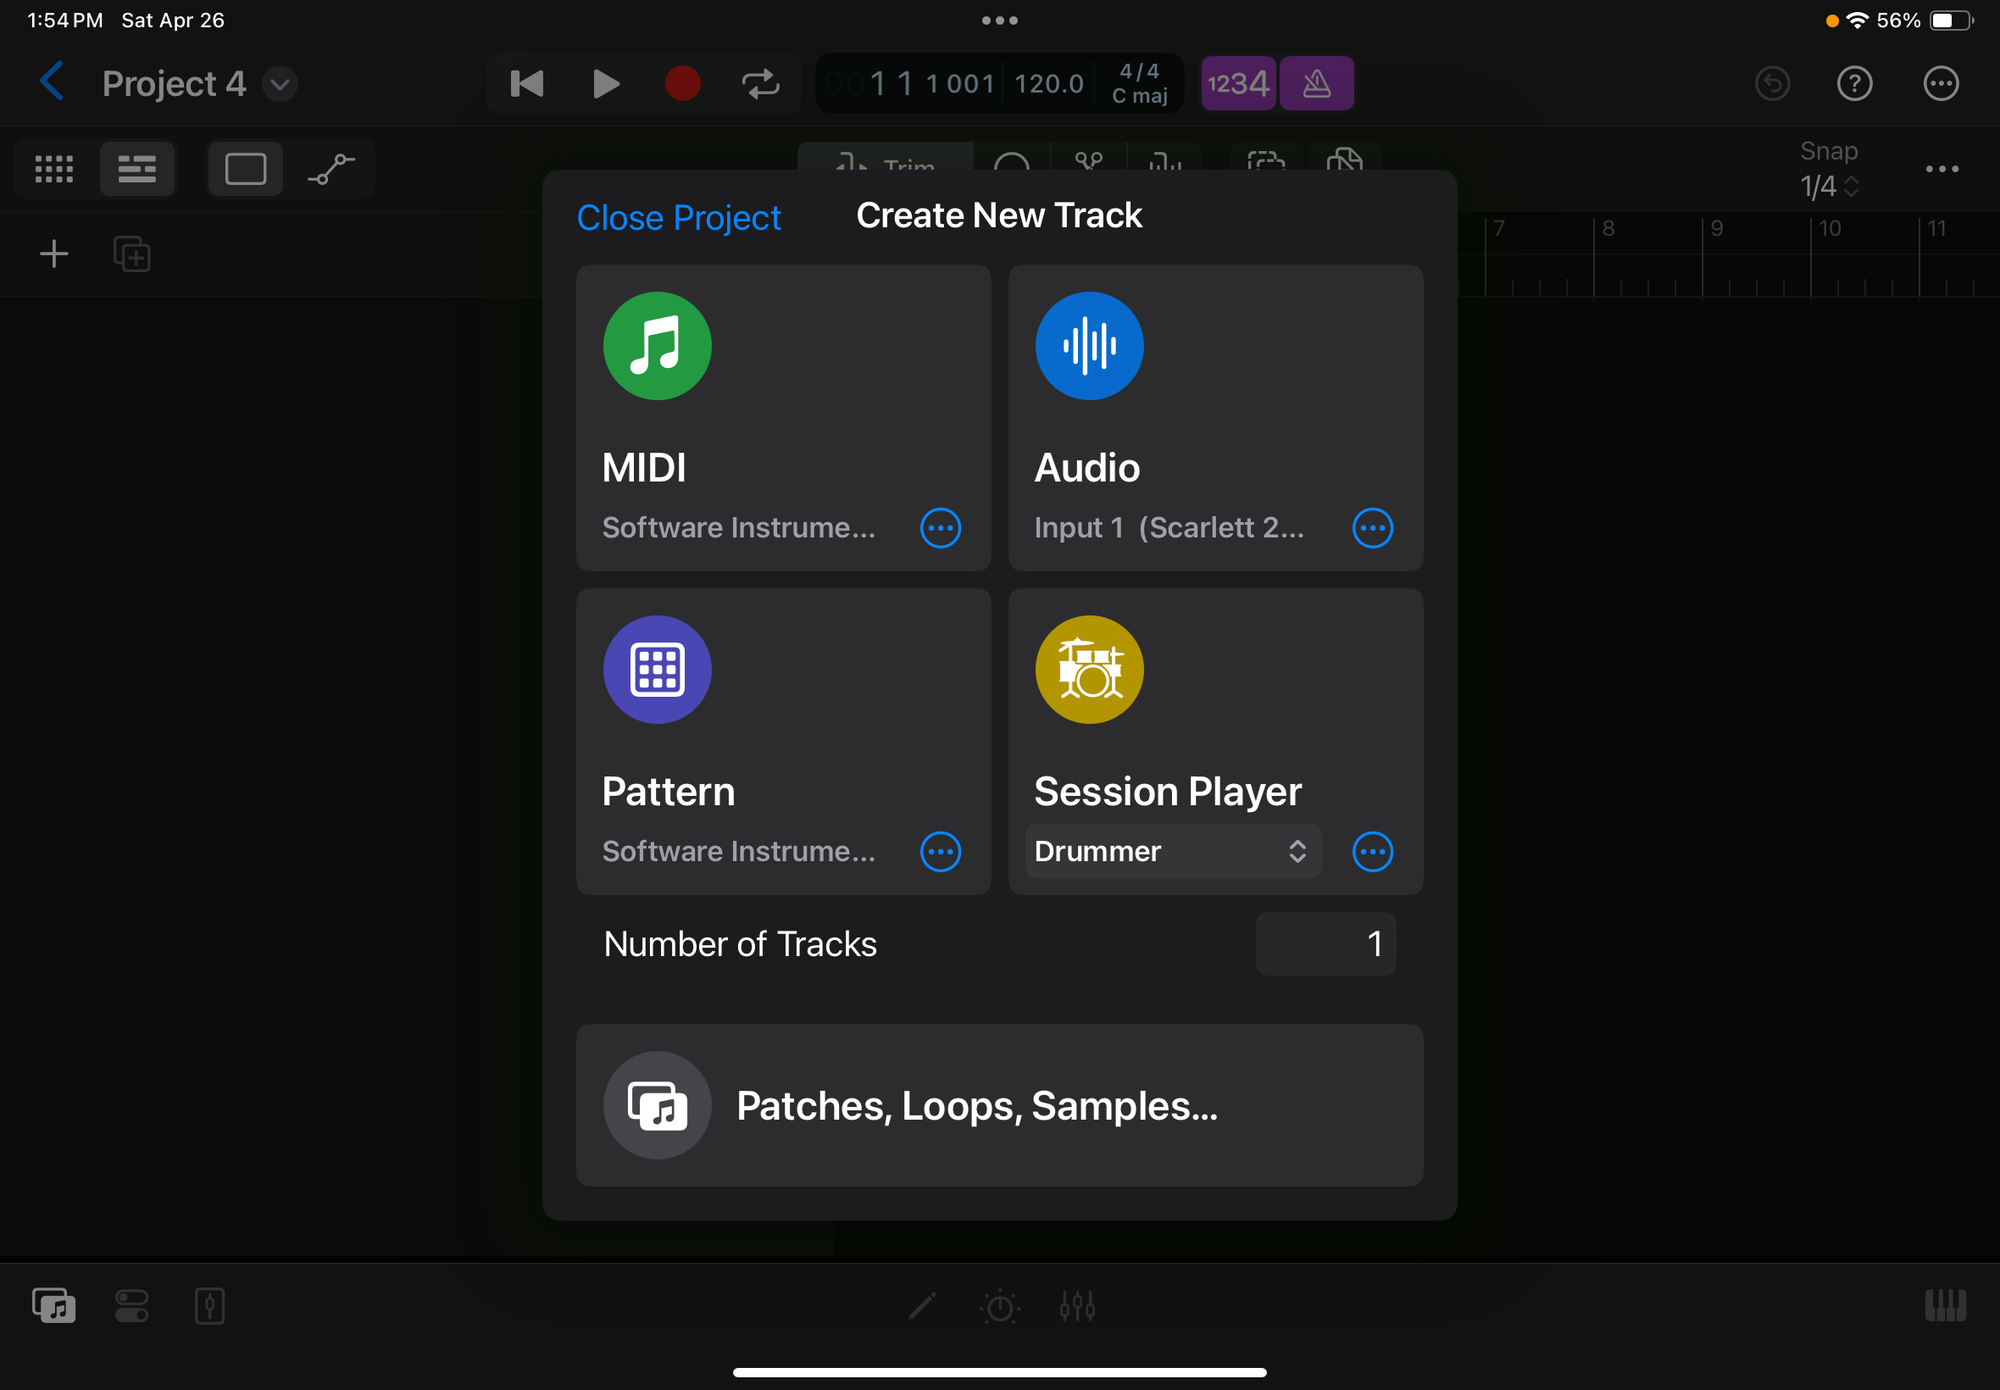
Launch Logic Pro on the iPad, and tap the + button in the upper right to create a new project. Tap the Tracks tile that appears. This will bring up a panel where you can select the type of track you want to create.
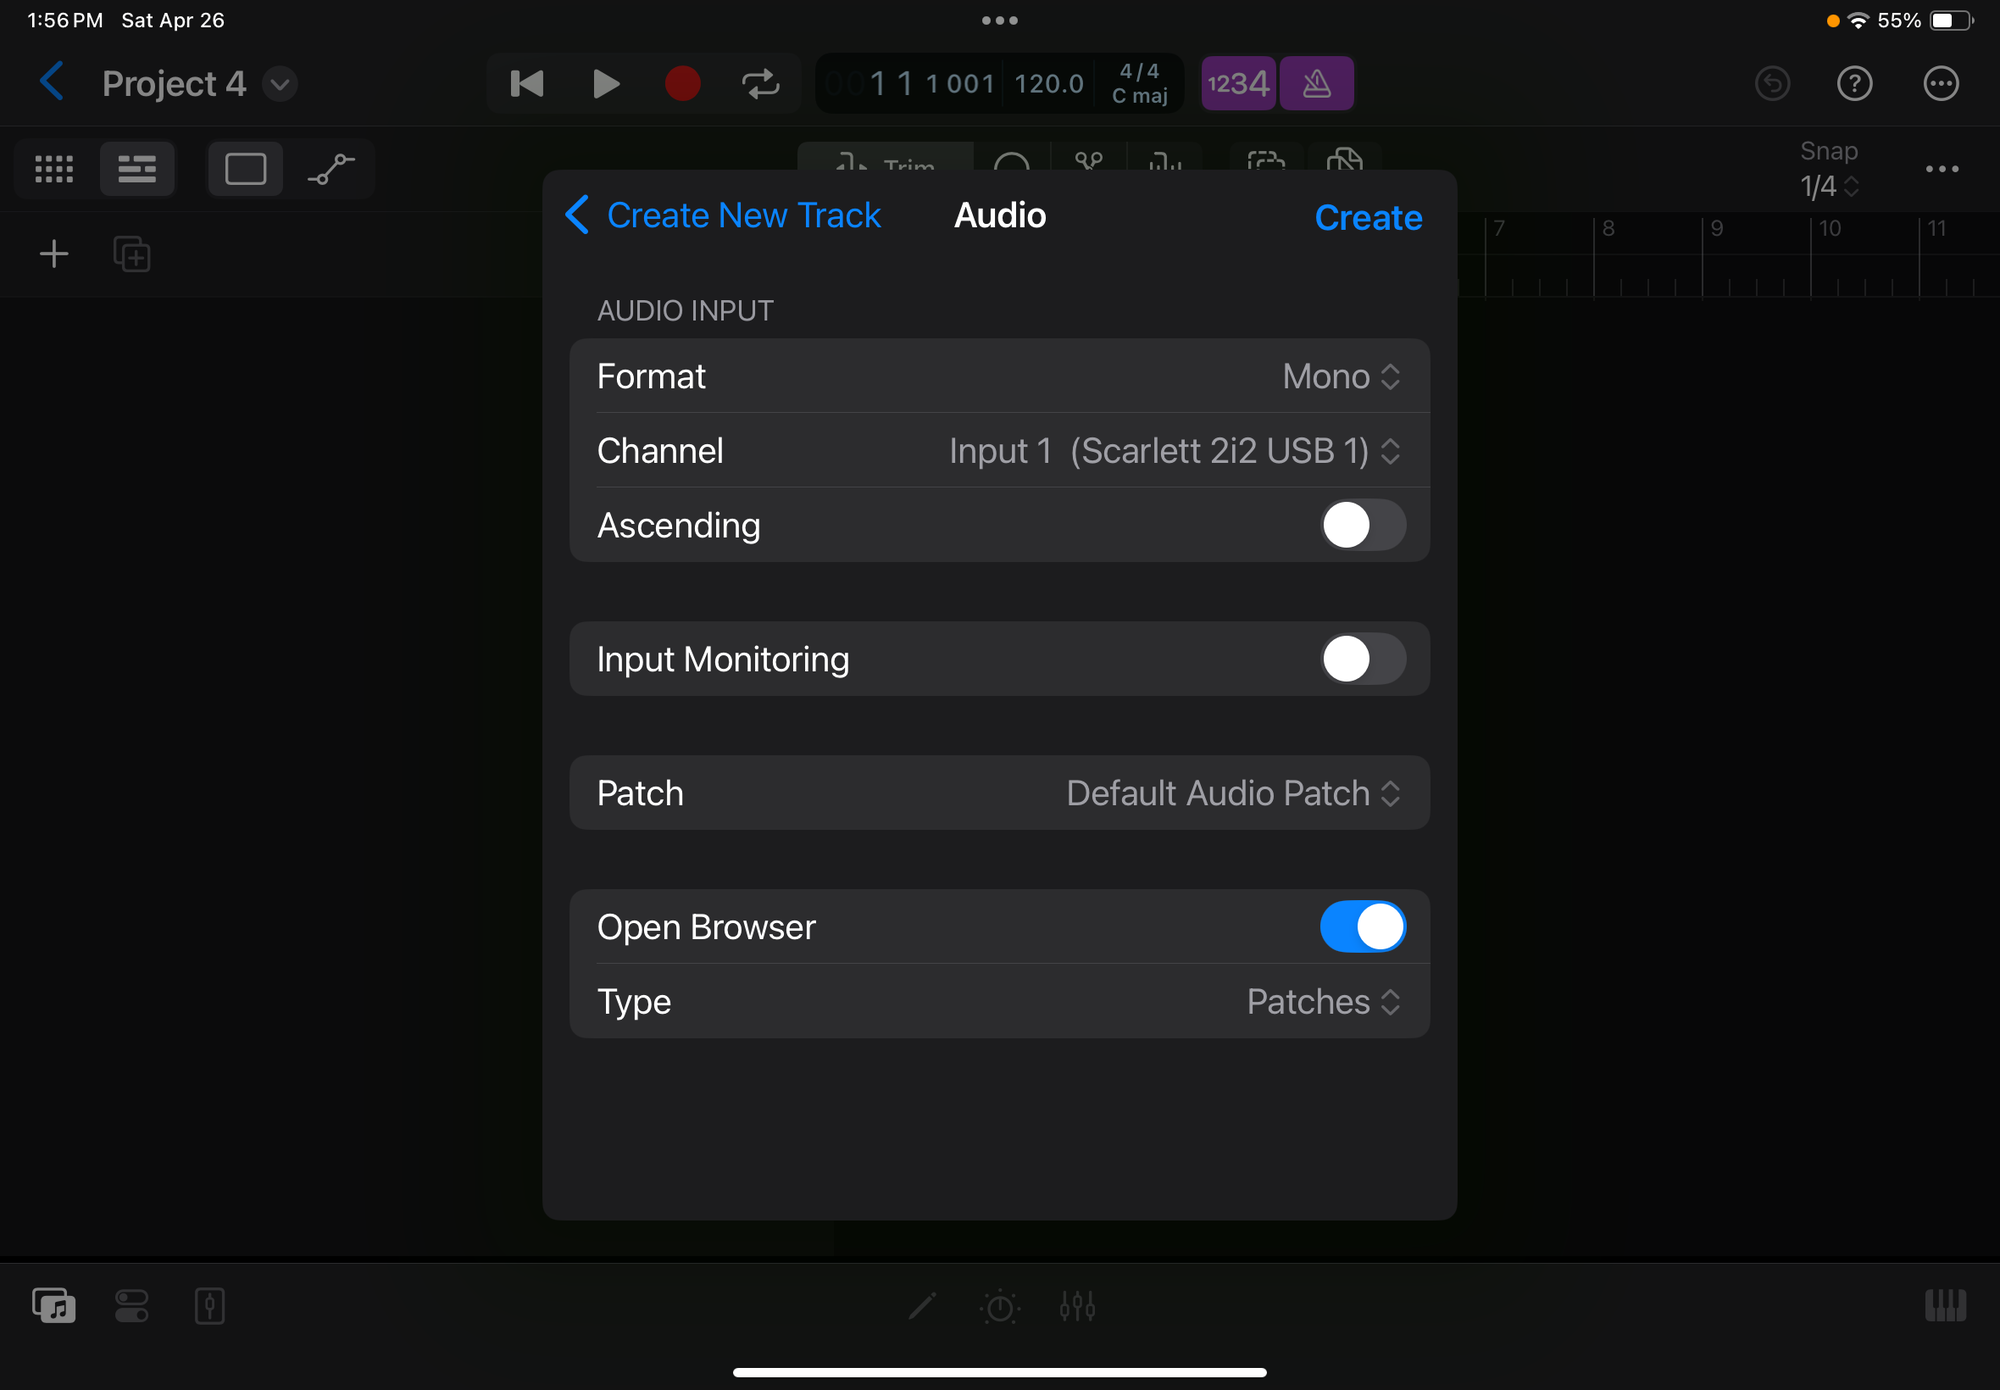
On the Audio tile, tap the ... button in the lower right, and select the input from the audio interface to the right of Channel. It should match the port you’ve plugged your guitar into.
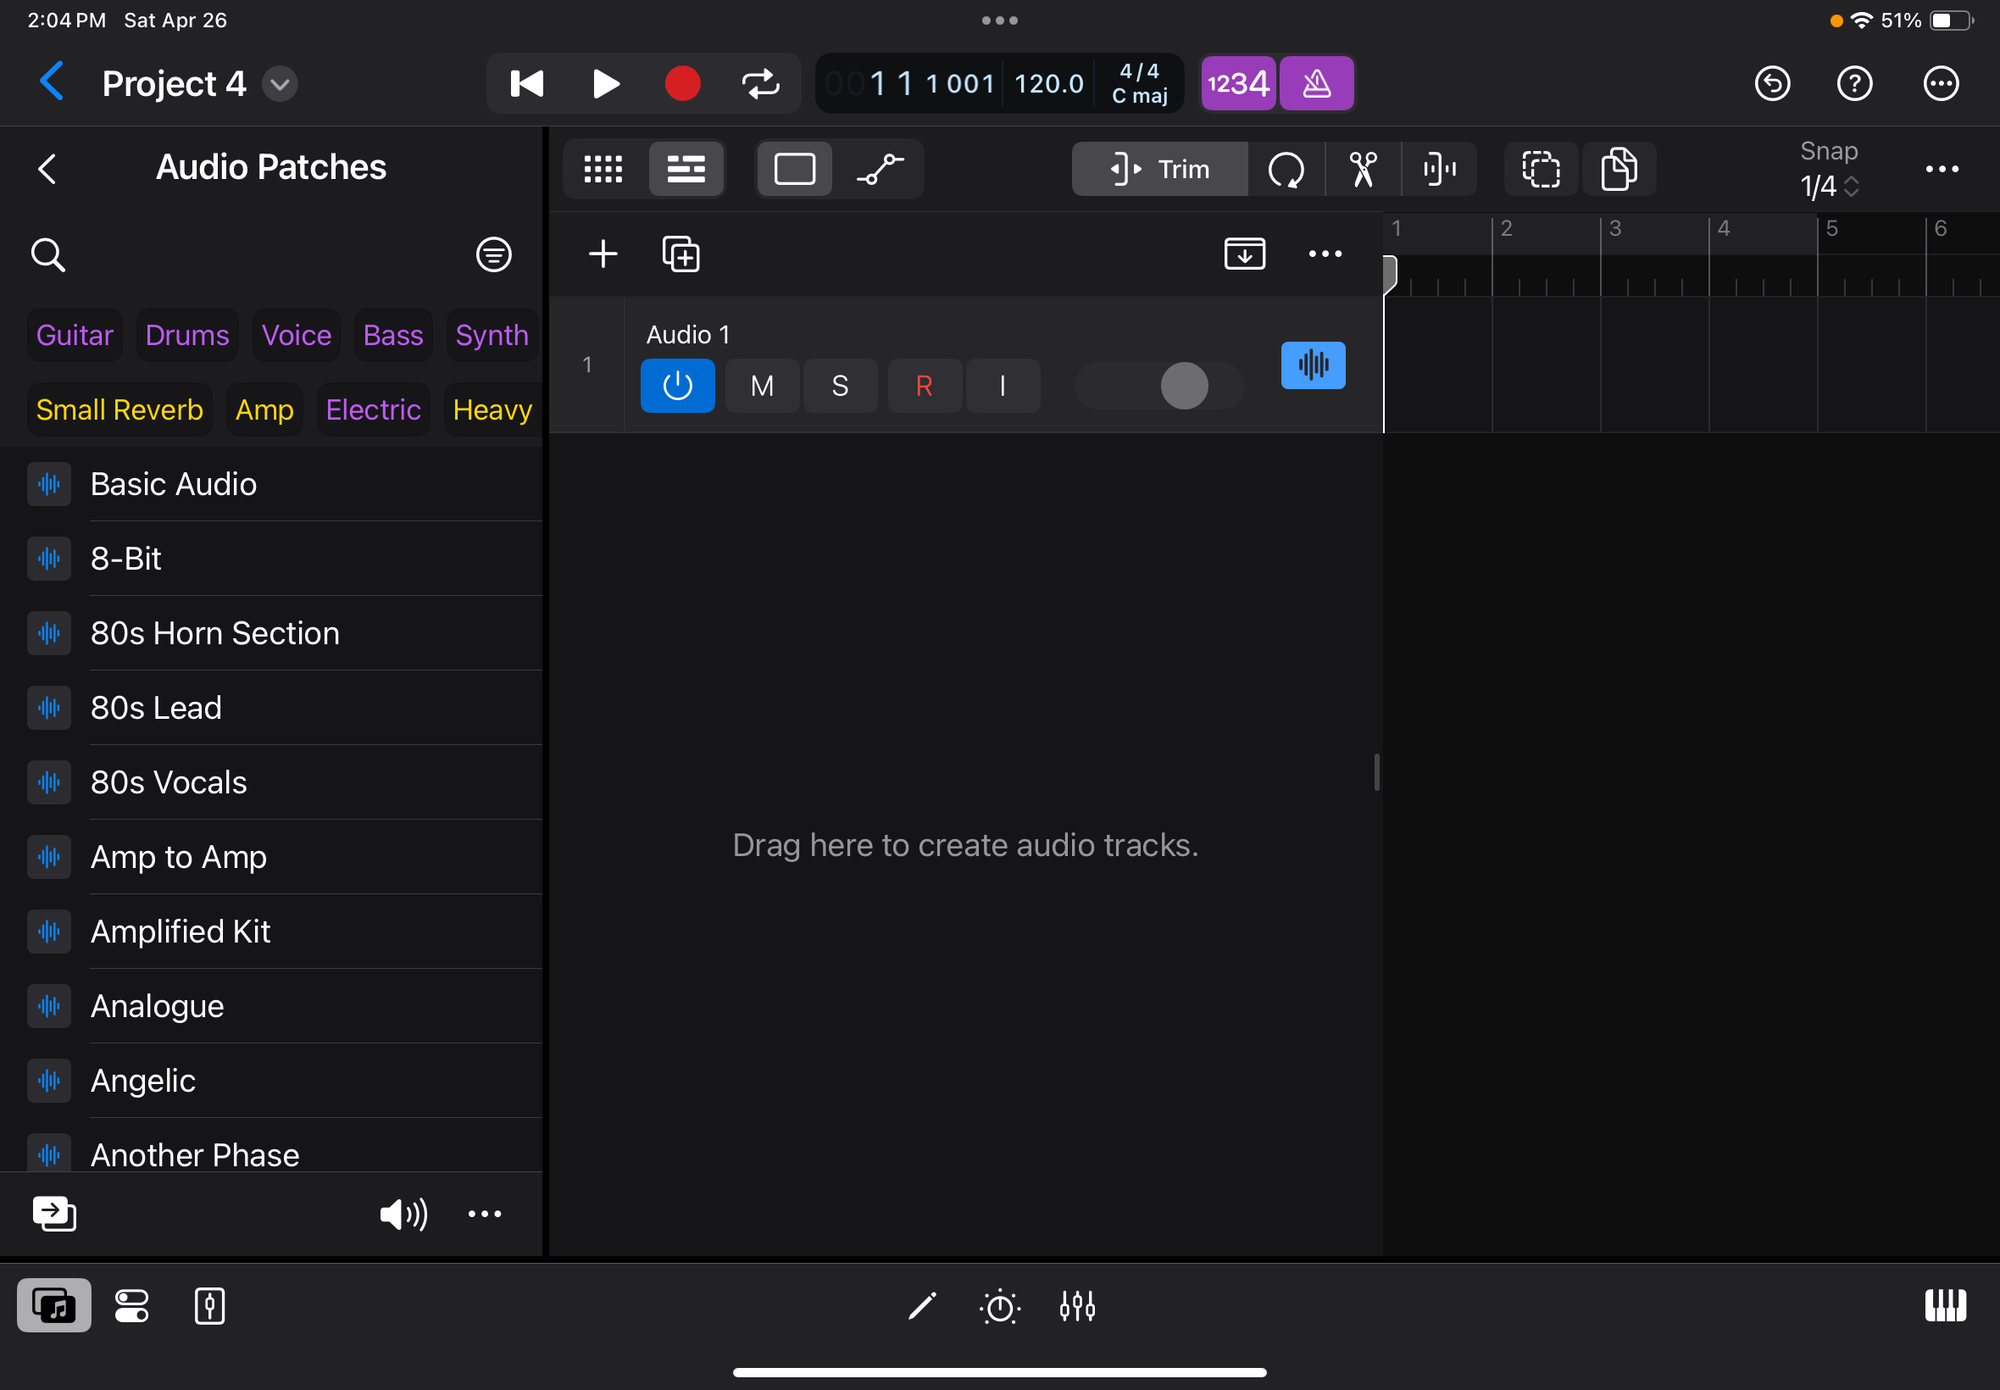
Tap Create, which will return you to the main Logic Pro interface. You should see the Audio 1 track you created.
Tap the I button, turning it orange. Strum your guitar; you should hear it in the speakers connected to your audio interface. This is a dry signal without any effects or processing.
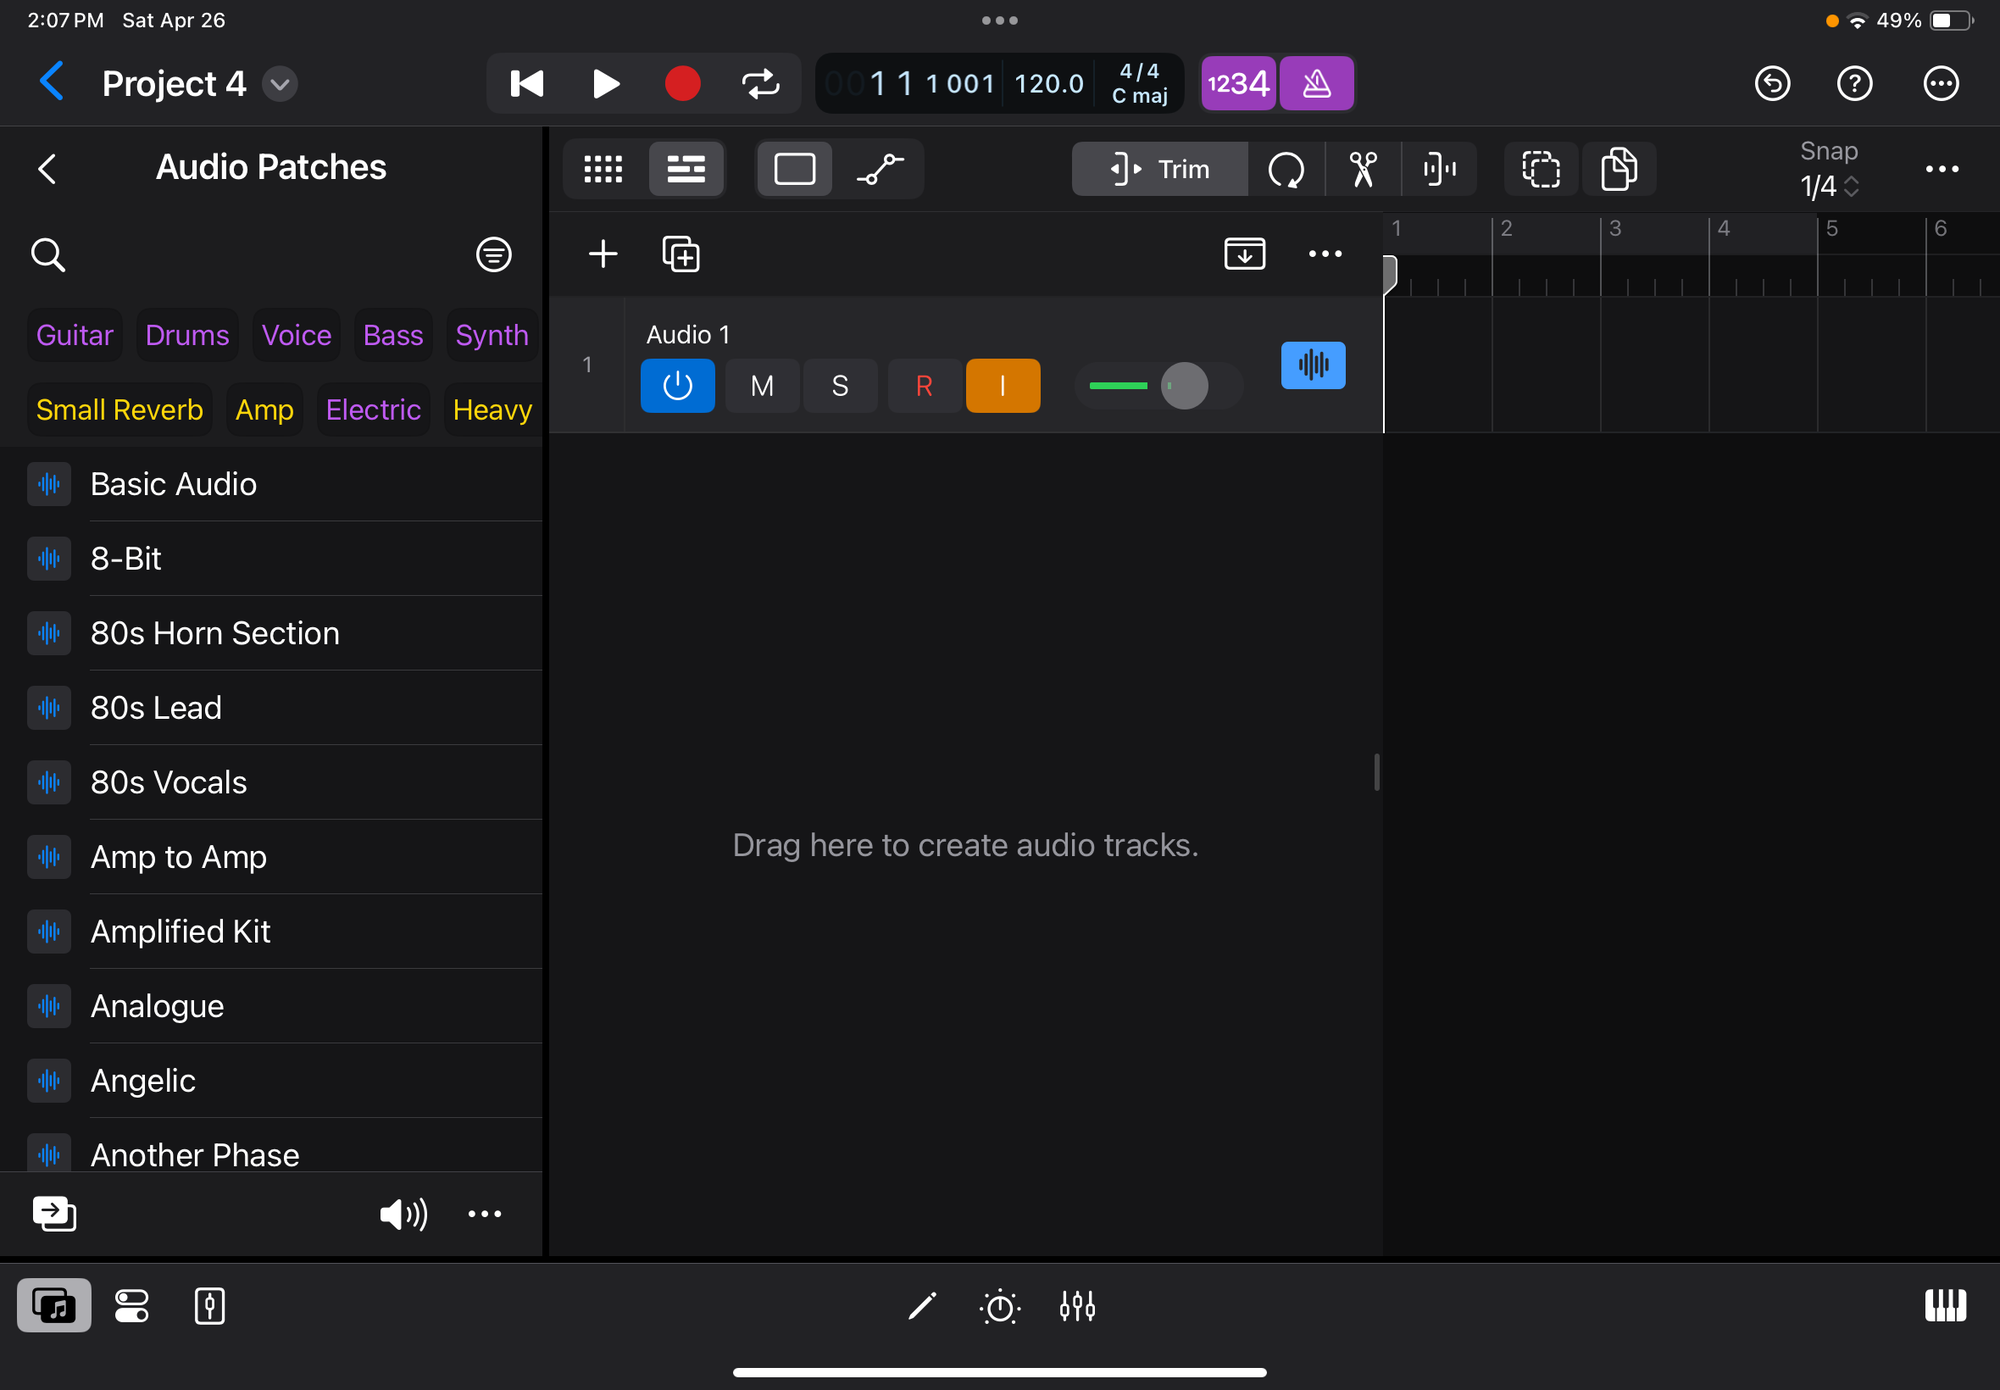
The M button is for muting that track; tapping it makes it glow light blue. The S button is for soloing that track (that is, muting all the other tracks); tapping it turns it yellow. The R button is for recording, and tapping it makes the button flash red. As you play, you can see the level to the right of the I button; you can adjust the level with the slider.
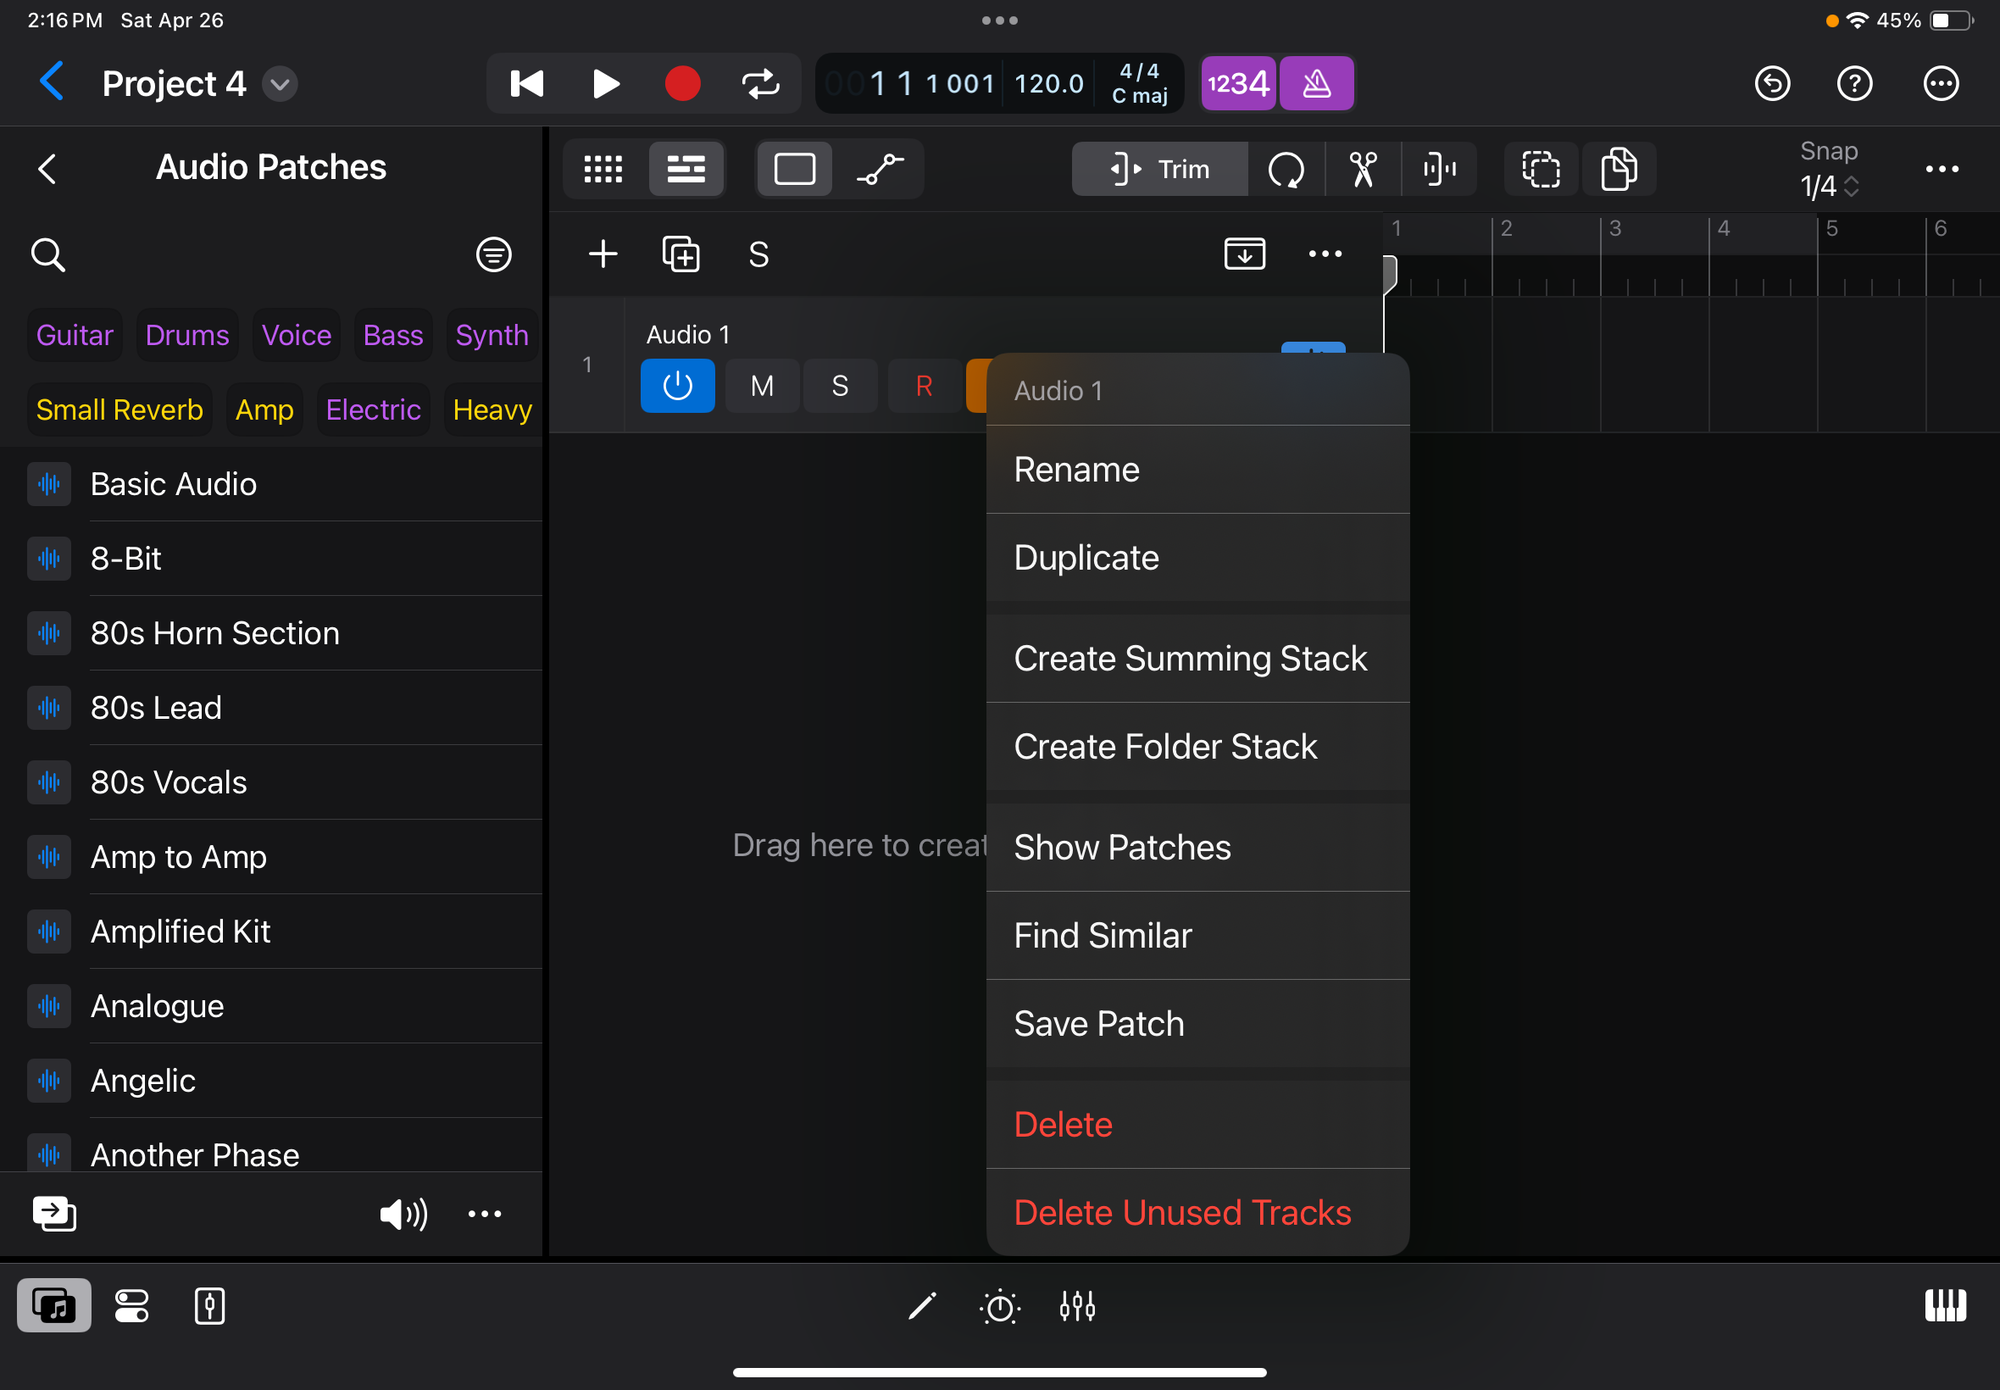
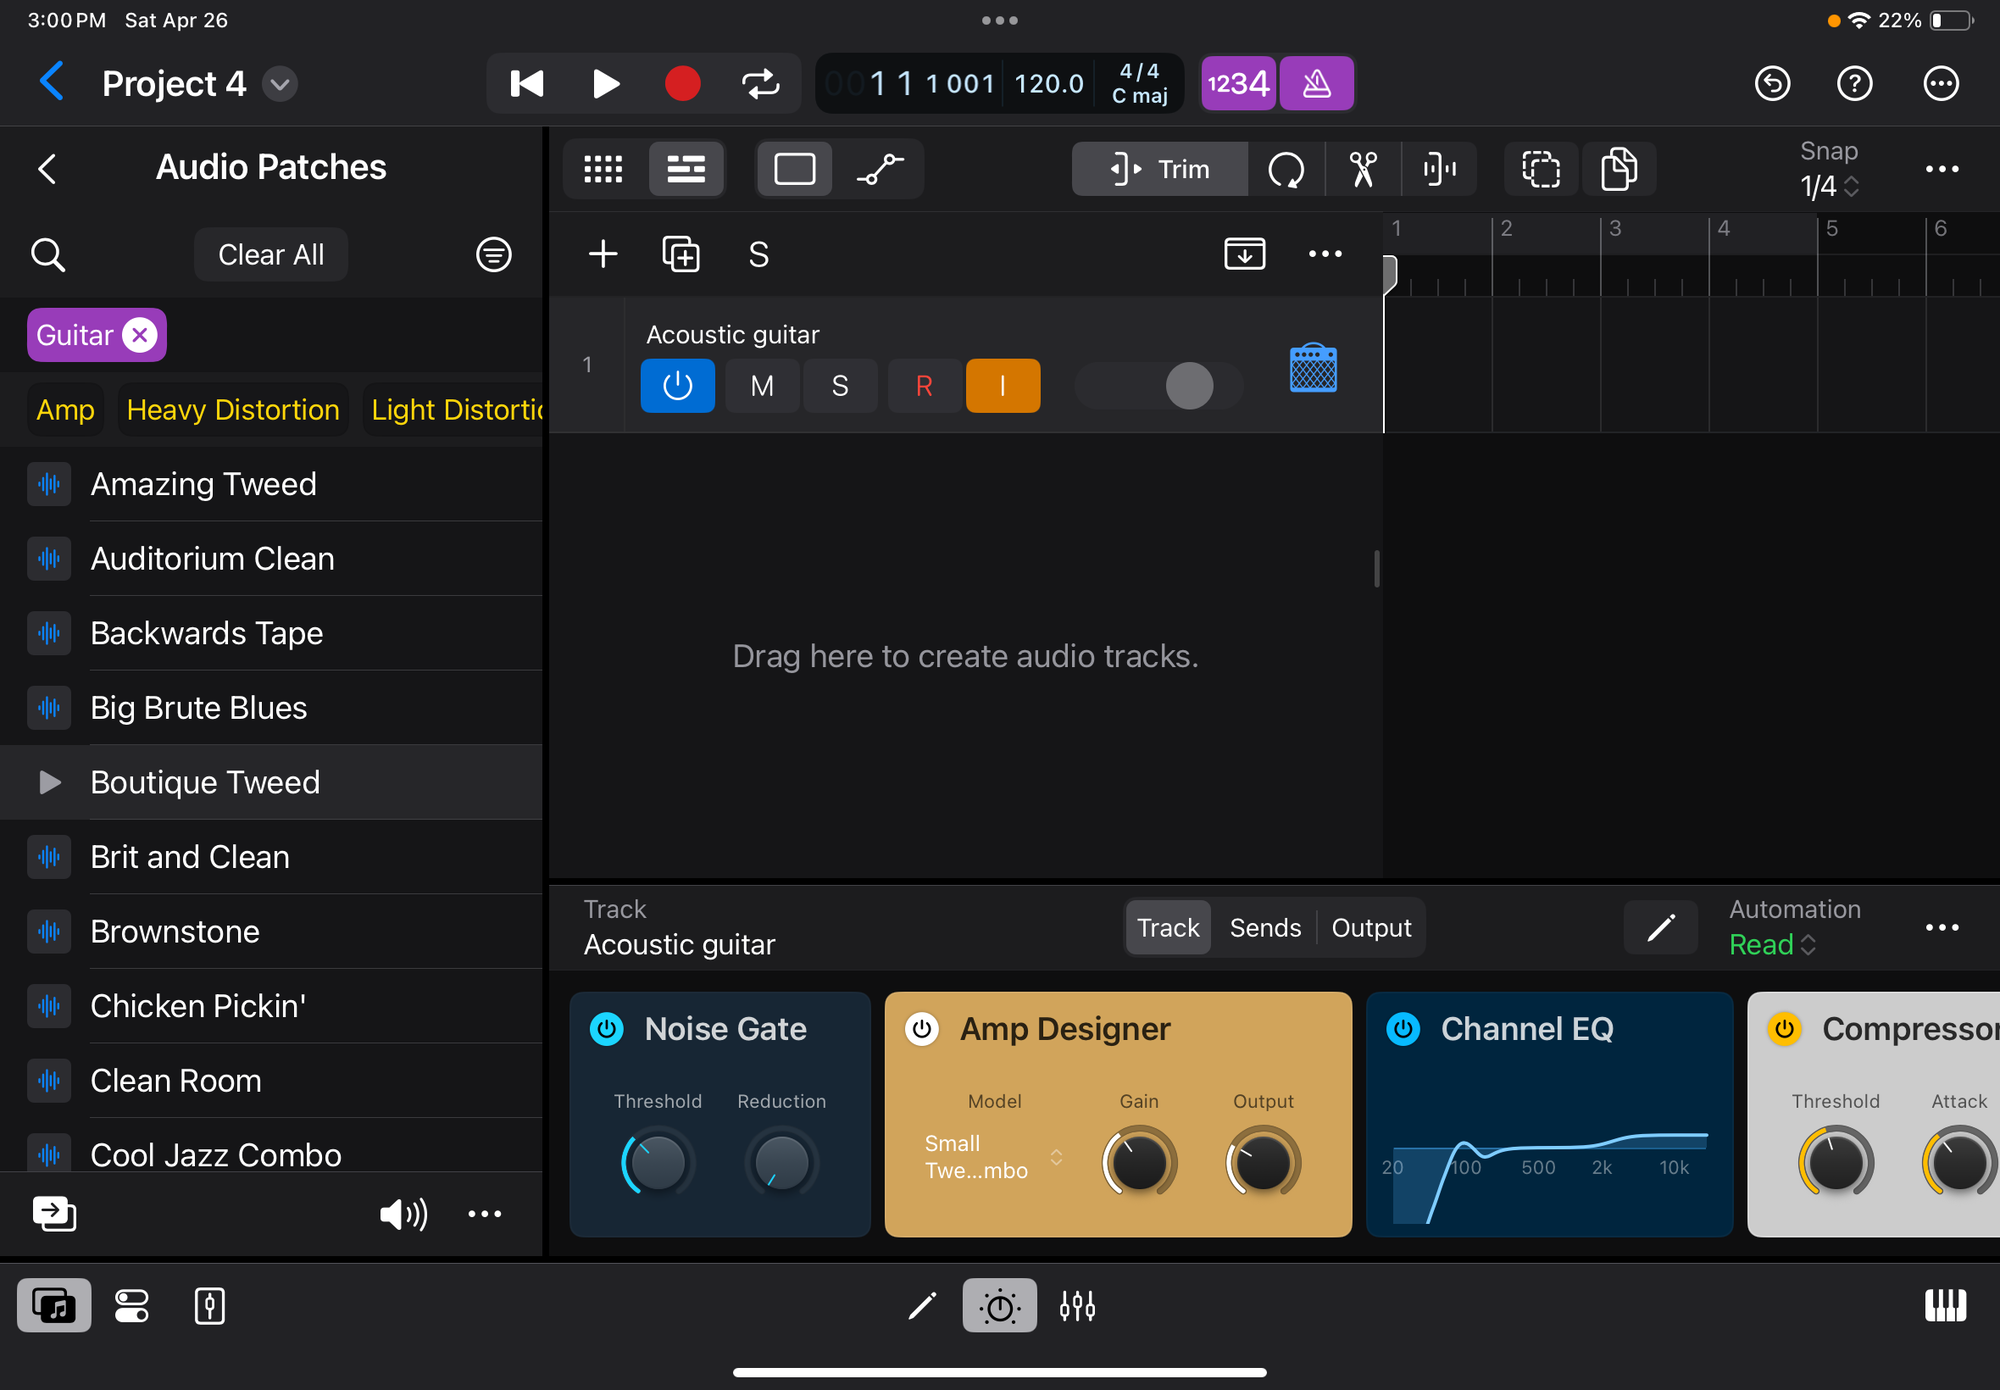
Tap the blue button with vertical bars just to the right of the input slider. It will bring up a window with some options, including renaming the track, duplicating it, and deleting it. I’ve renamed mine Acoustic guitar. Renaming is useful if you add other tracks.
Double-tap the blue button to see the settings for the track, displayed at the bottom of the window.
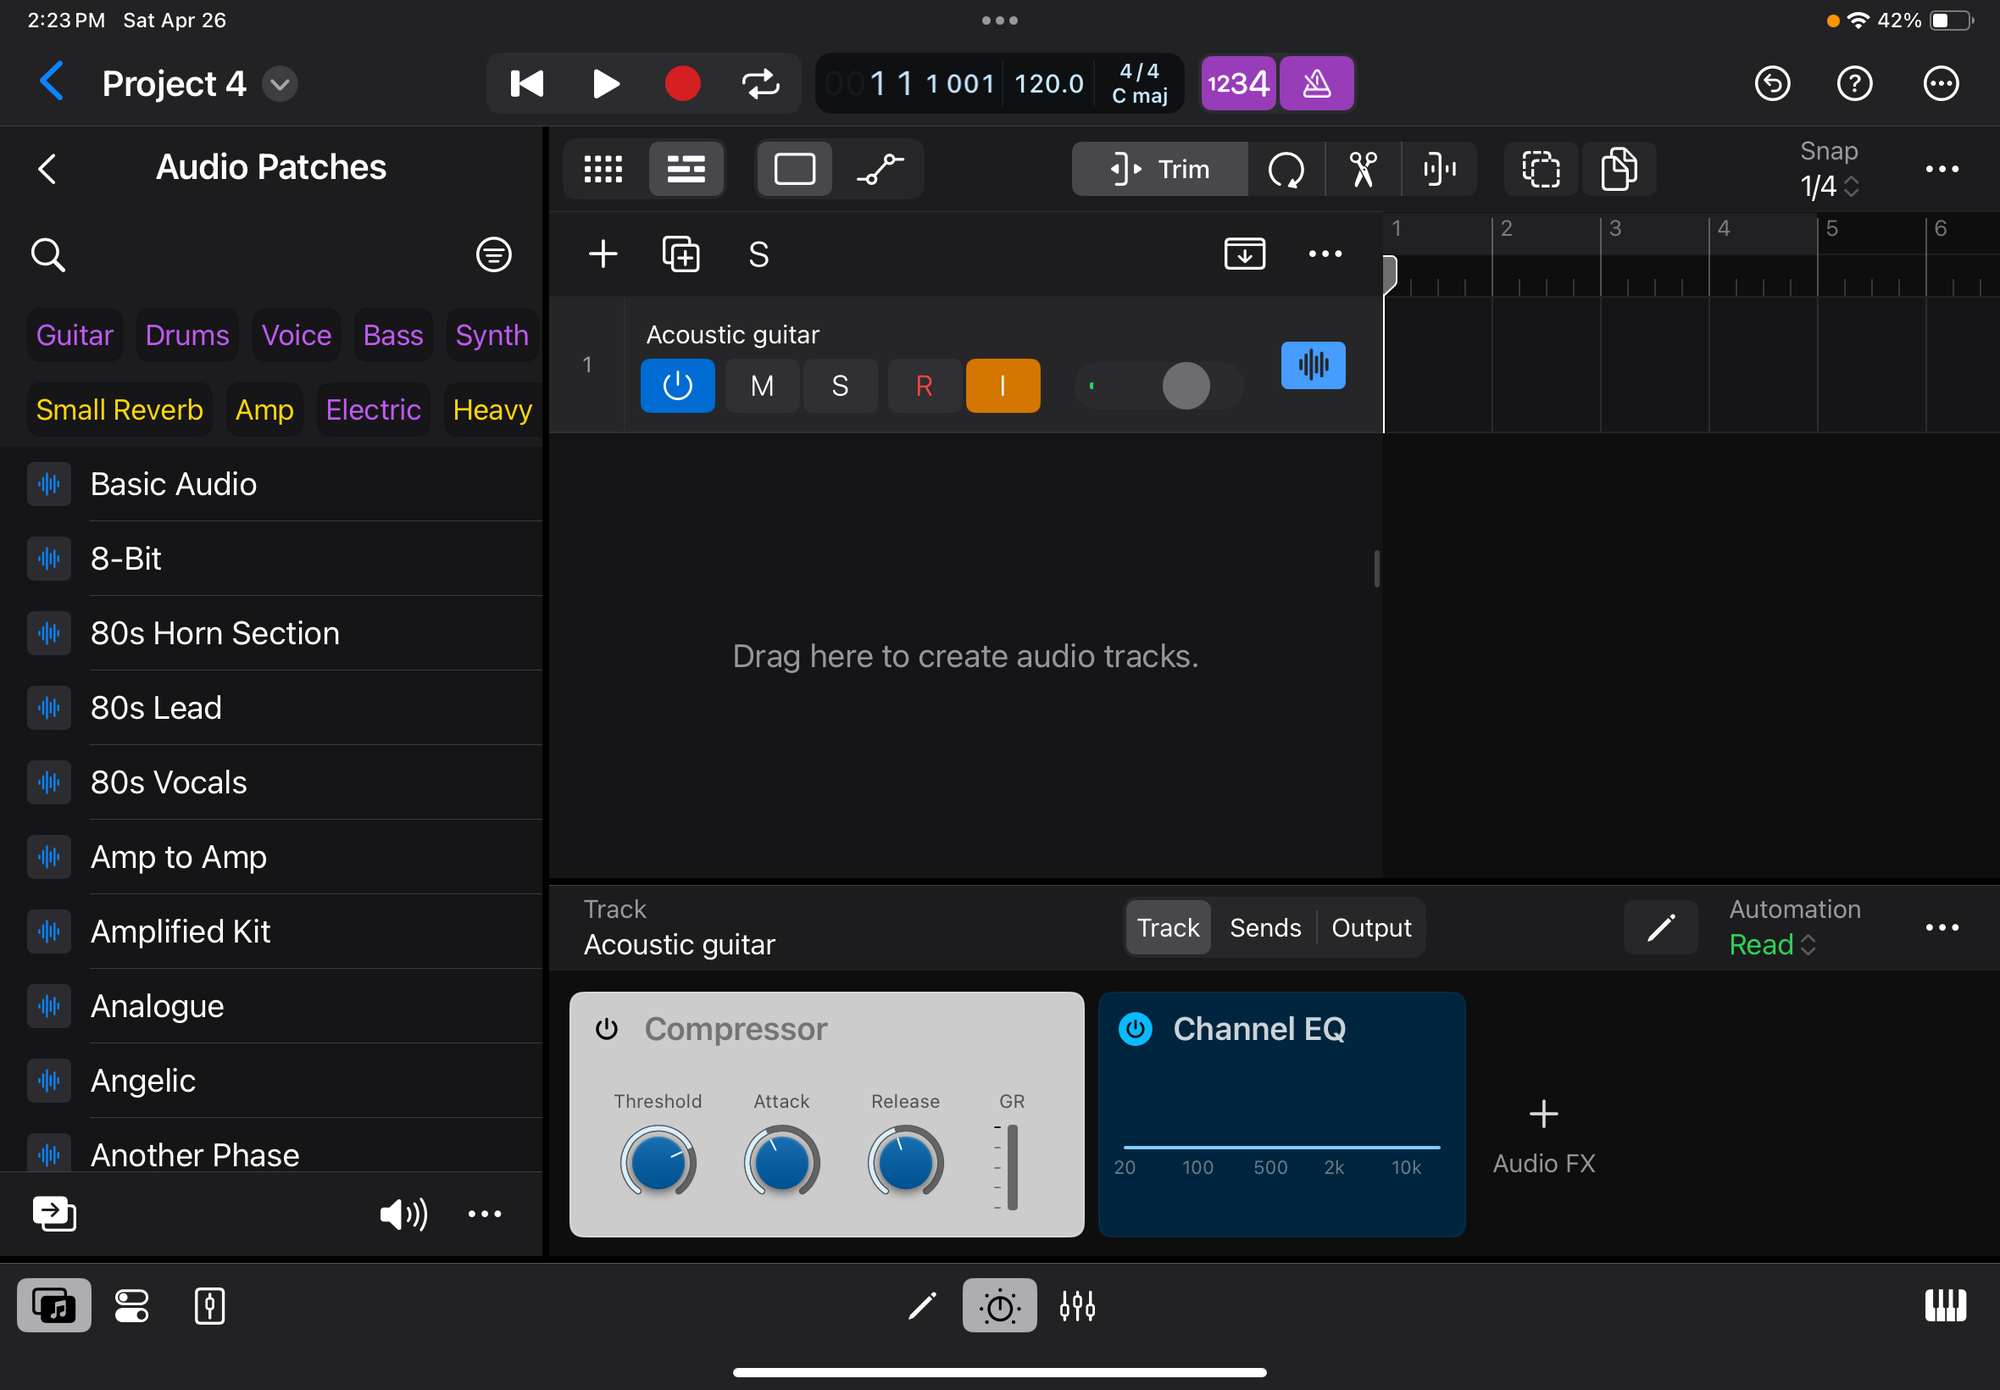
There isn’t much to this track, just a compressor and EQ. You can adjust the dials by touching and dragging upward (to increase) or downward (to decrease). Double-trapping the Channel EQ will give you various points to increase or decrease particular frequency ranges. Double-tapping either panel will gives more options; use the back arrow in the upper right of that window to get to the original view. You can close all these settings by double-tapping the same blue button you used to show these settings.
Applying built-in audio patches
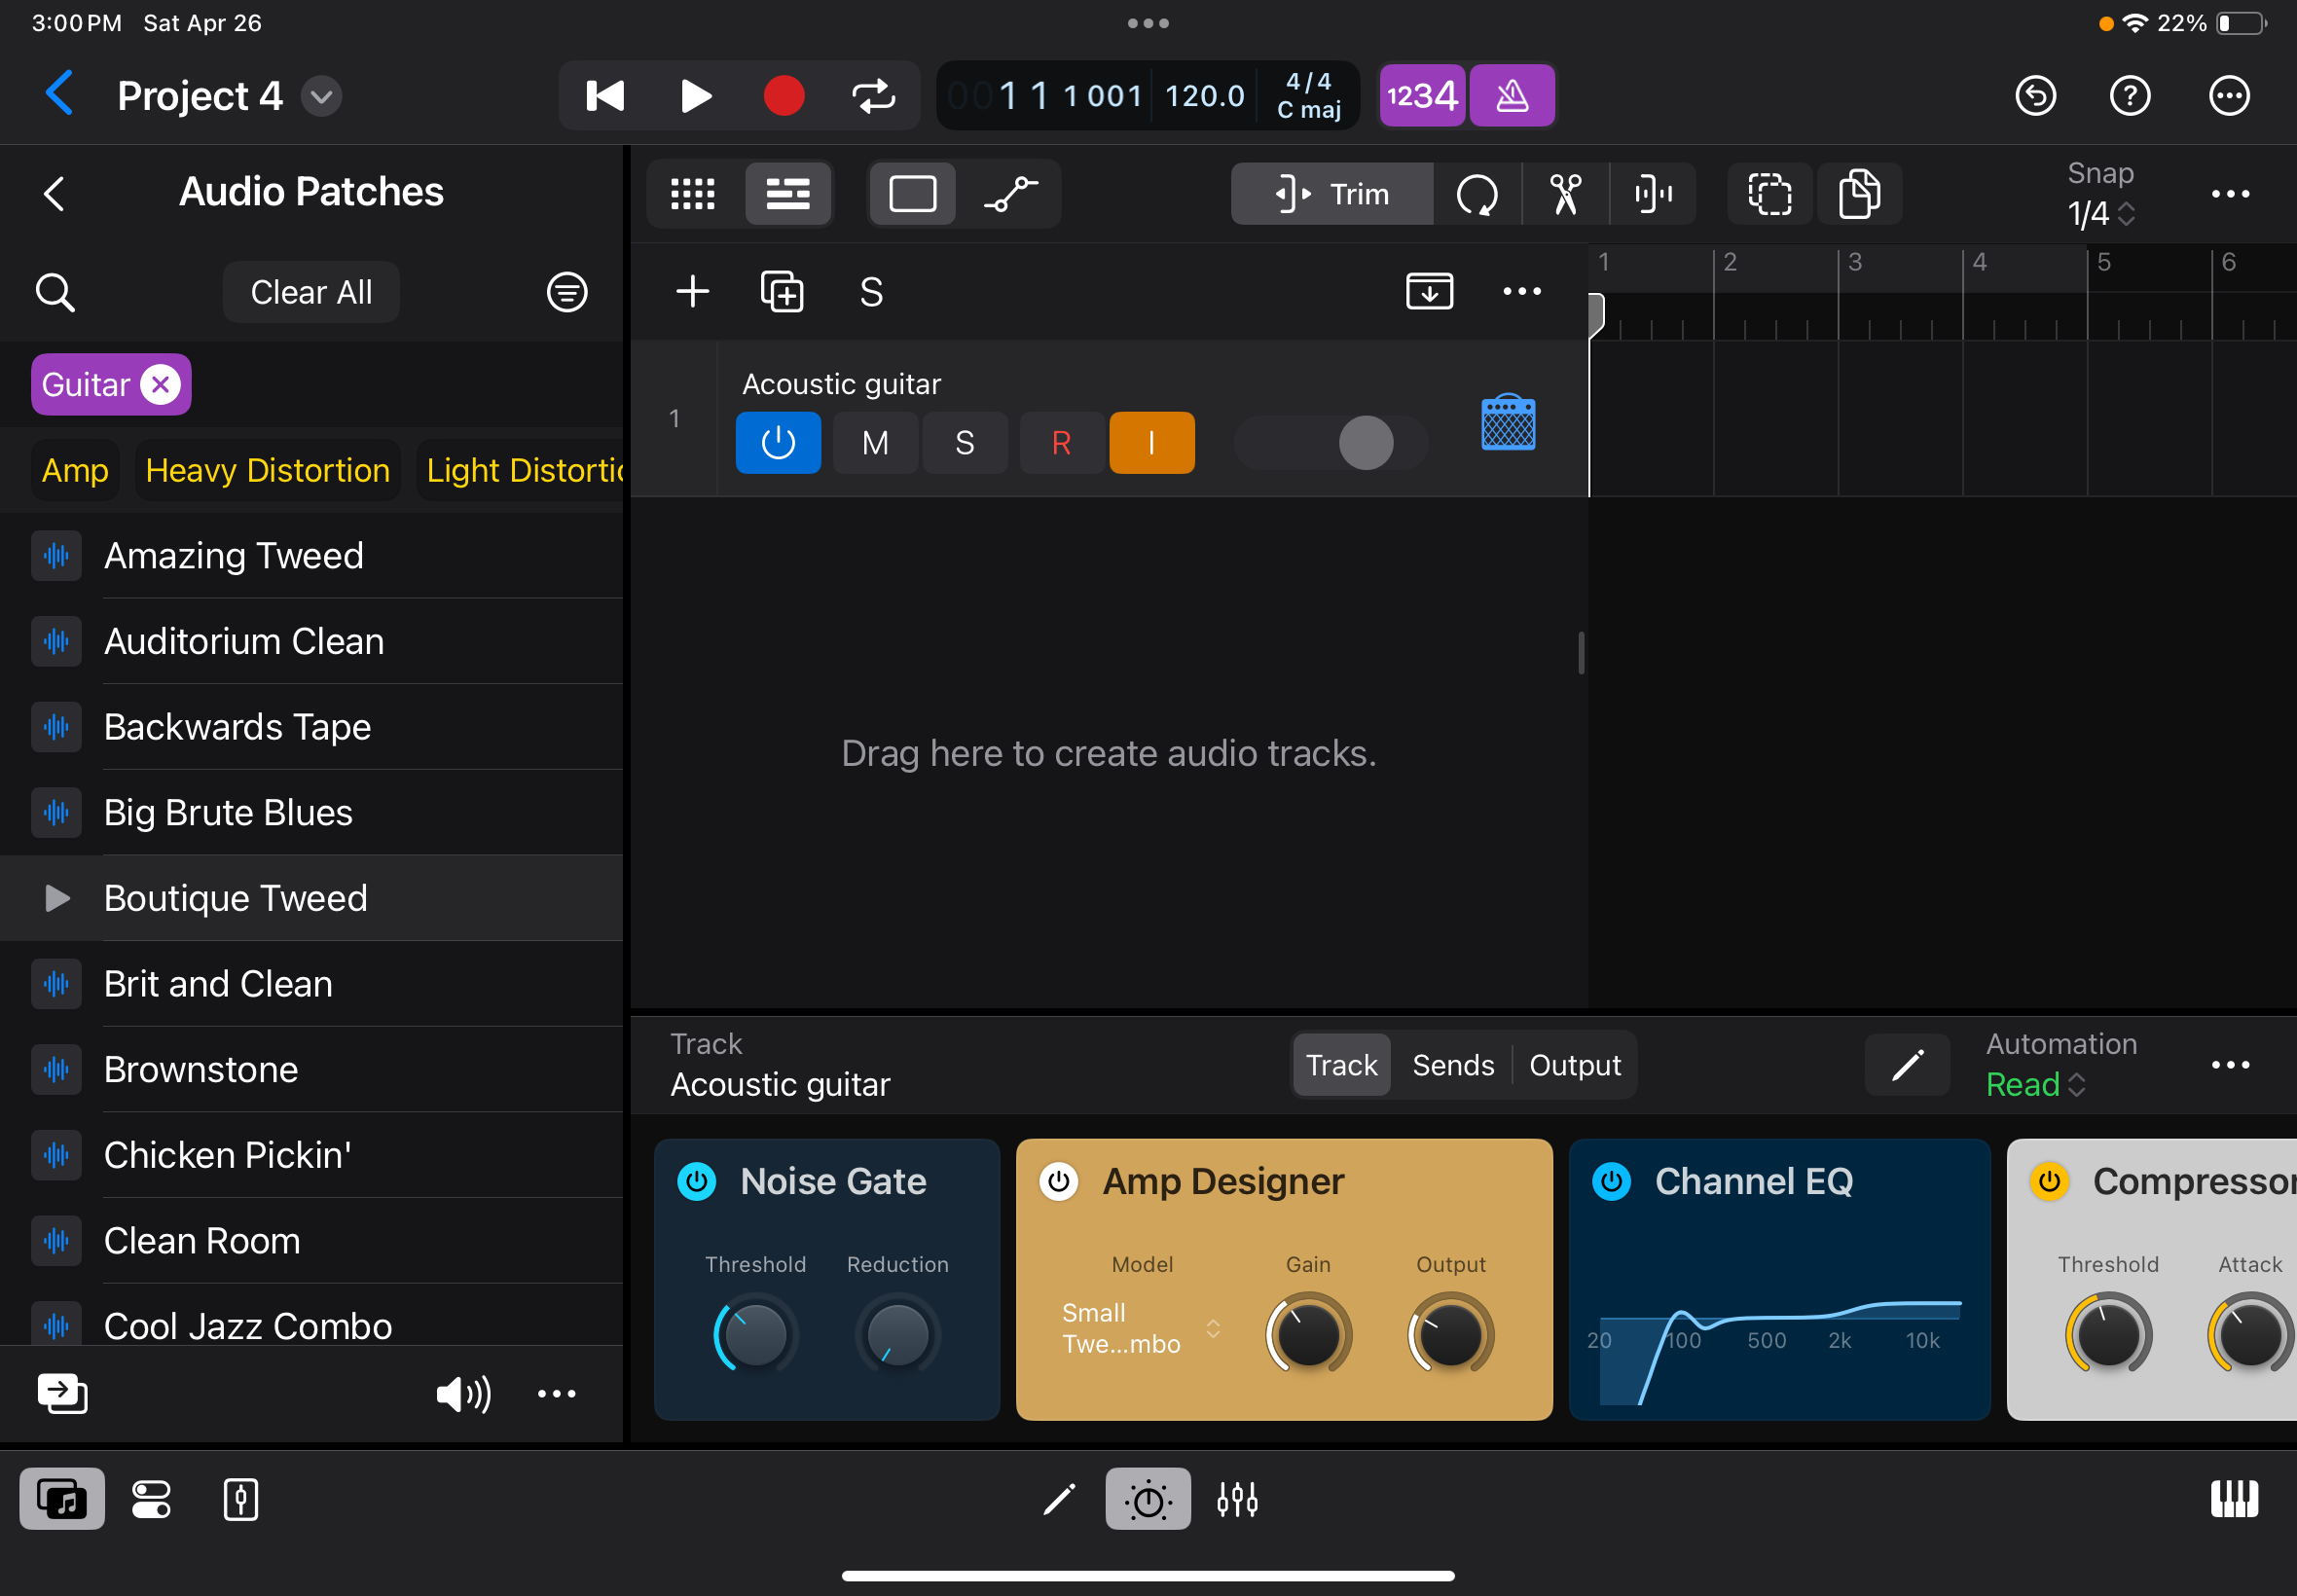
You can apply audio patches to substantially change the sound. In the panel on the left, the Audio Patches are displayed. At the top, tap on Guitar (a purple button), then tap on other modifiers like Amp, Reverb, Chorus, etc. to narrow the list of choices. Tap on a patch to select it, then tap on the gray arrow to its left to hear a sample. When you find a sound you like, tap and drag the patch onto your track (ours was Audio 1, but I renamed it Acoustic Guitar); when you see the green plus button, let go to put the patch onto your track. Strum your guitar and can hear the new sound.
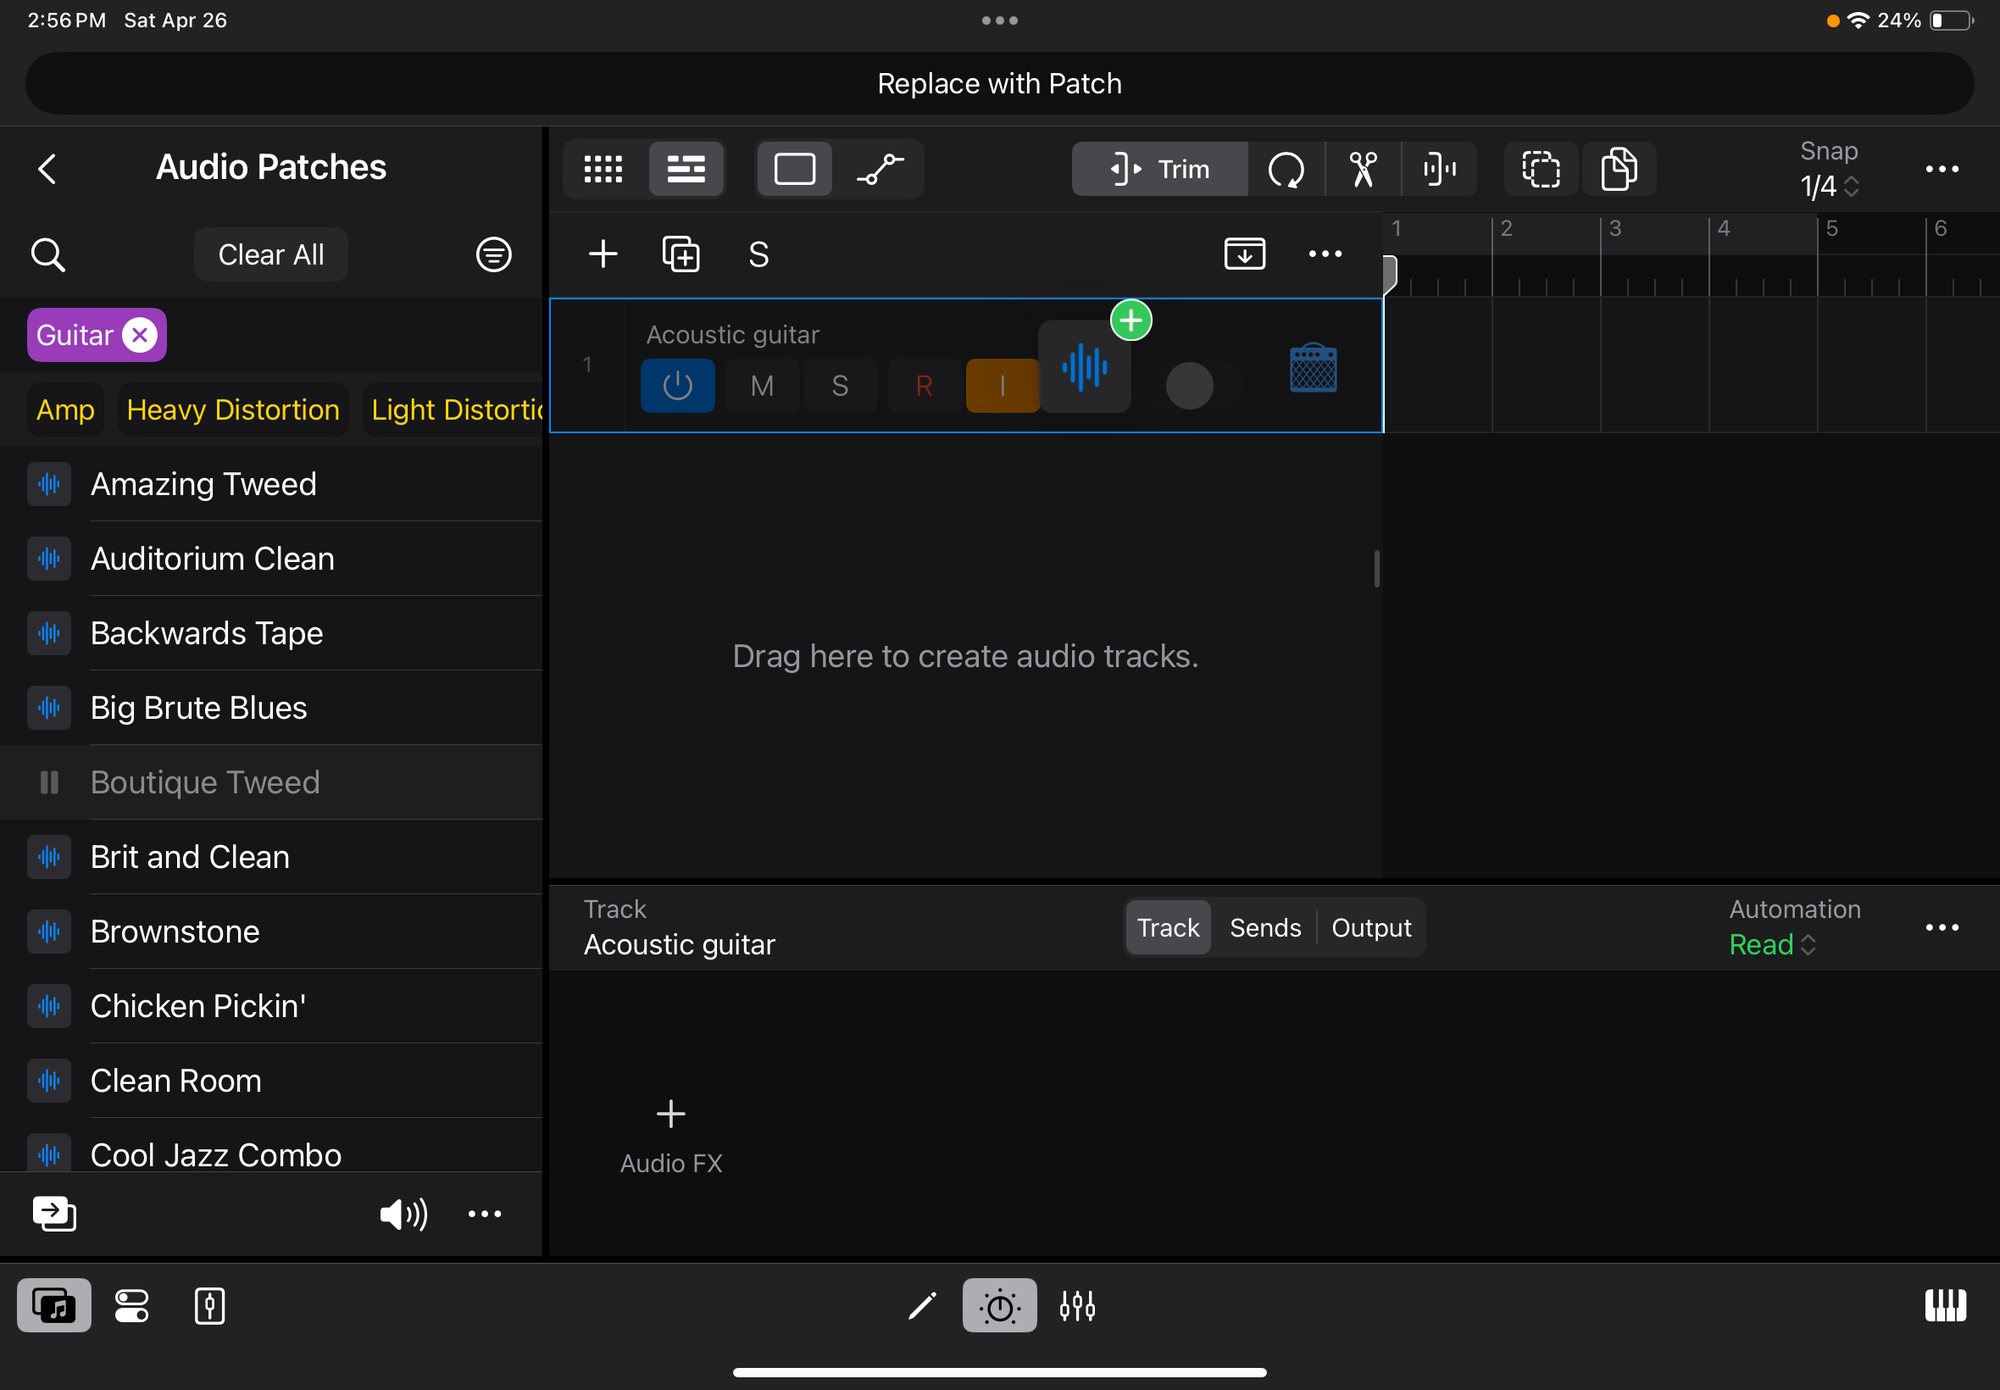
When you drag a patch, notice that the blue button with the vertical bars (the one to the right of the track volume slider) now looks like a blue amp. Double-tap it to bring up the settings, which you can adjust by tapping or dragging the controls.
Creating your own patches
Instead of using a built-in Audio Patch, you can design your own. First, we will remove everything we’ve added to our track. At the far right in the track settings area, tap the ... button (orange arrow), then tap Remove All Effect Plugins. This will give you a clean slate. Next, tap the plus sign over Audio FX (yellow arrow). From here, you can select an amp by tapping Amp Designer, picking a model, and selecting your desired amp.
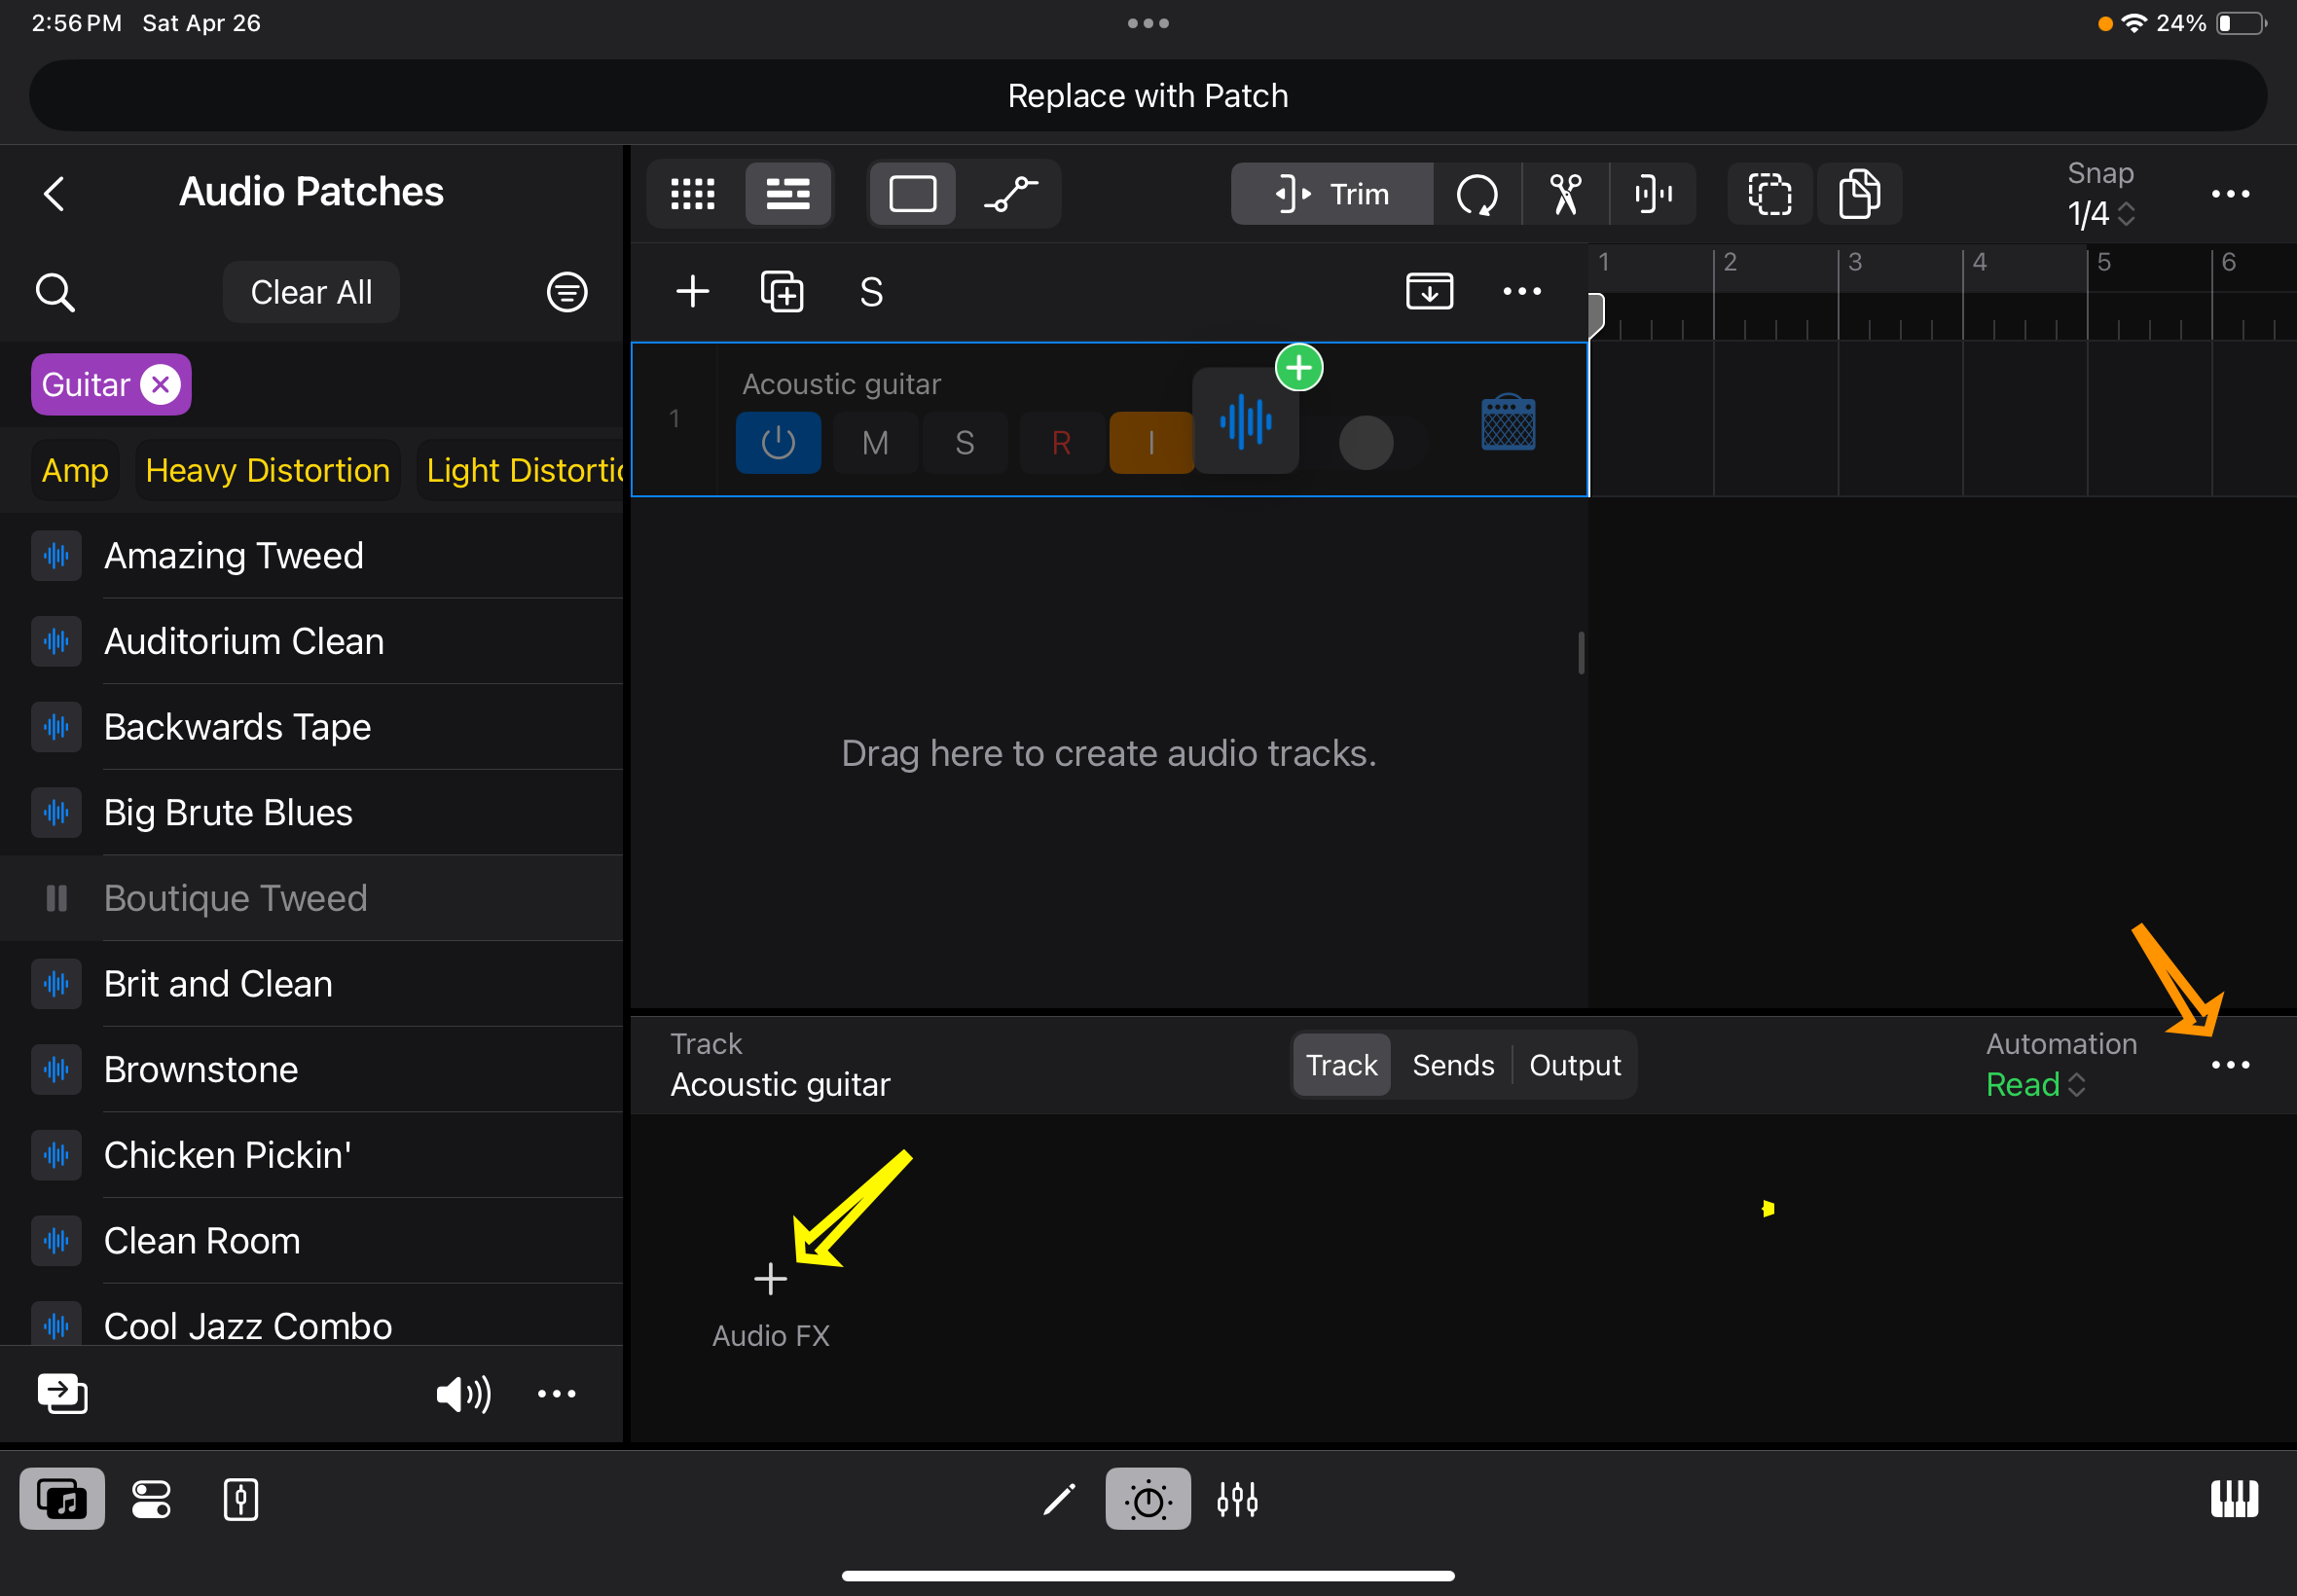
Tap the plus sign over Audio FX to add other effects like Reverb, Delay, Chorus, etc.
I won’t cover it here, but you can also add tracks for other instruments, including a drummer, etc.
Pete Johns has an excellent half-hour YouTube video on Logic Pro for the iPad; I highly recommend it!
Connecting with a Mustang Micro
You can also use Fender’s Mustang Micro plug-in amp as the audio interface. Plug the Mustang Micro into your guitar, then run a USB-C / USB-C cable from the Mustang Micro to the iPad. That’s it. Don’t plug headphones into the Mustang Micro because you cannot monitor the output through the headphones, and you can't hear other tracks (like drums). Instead, listen to the guitar through the iPad speakers as you play.
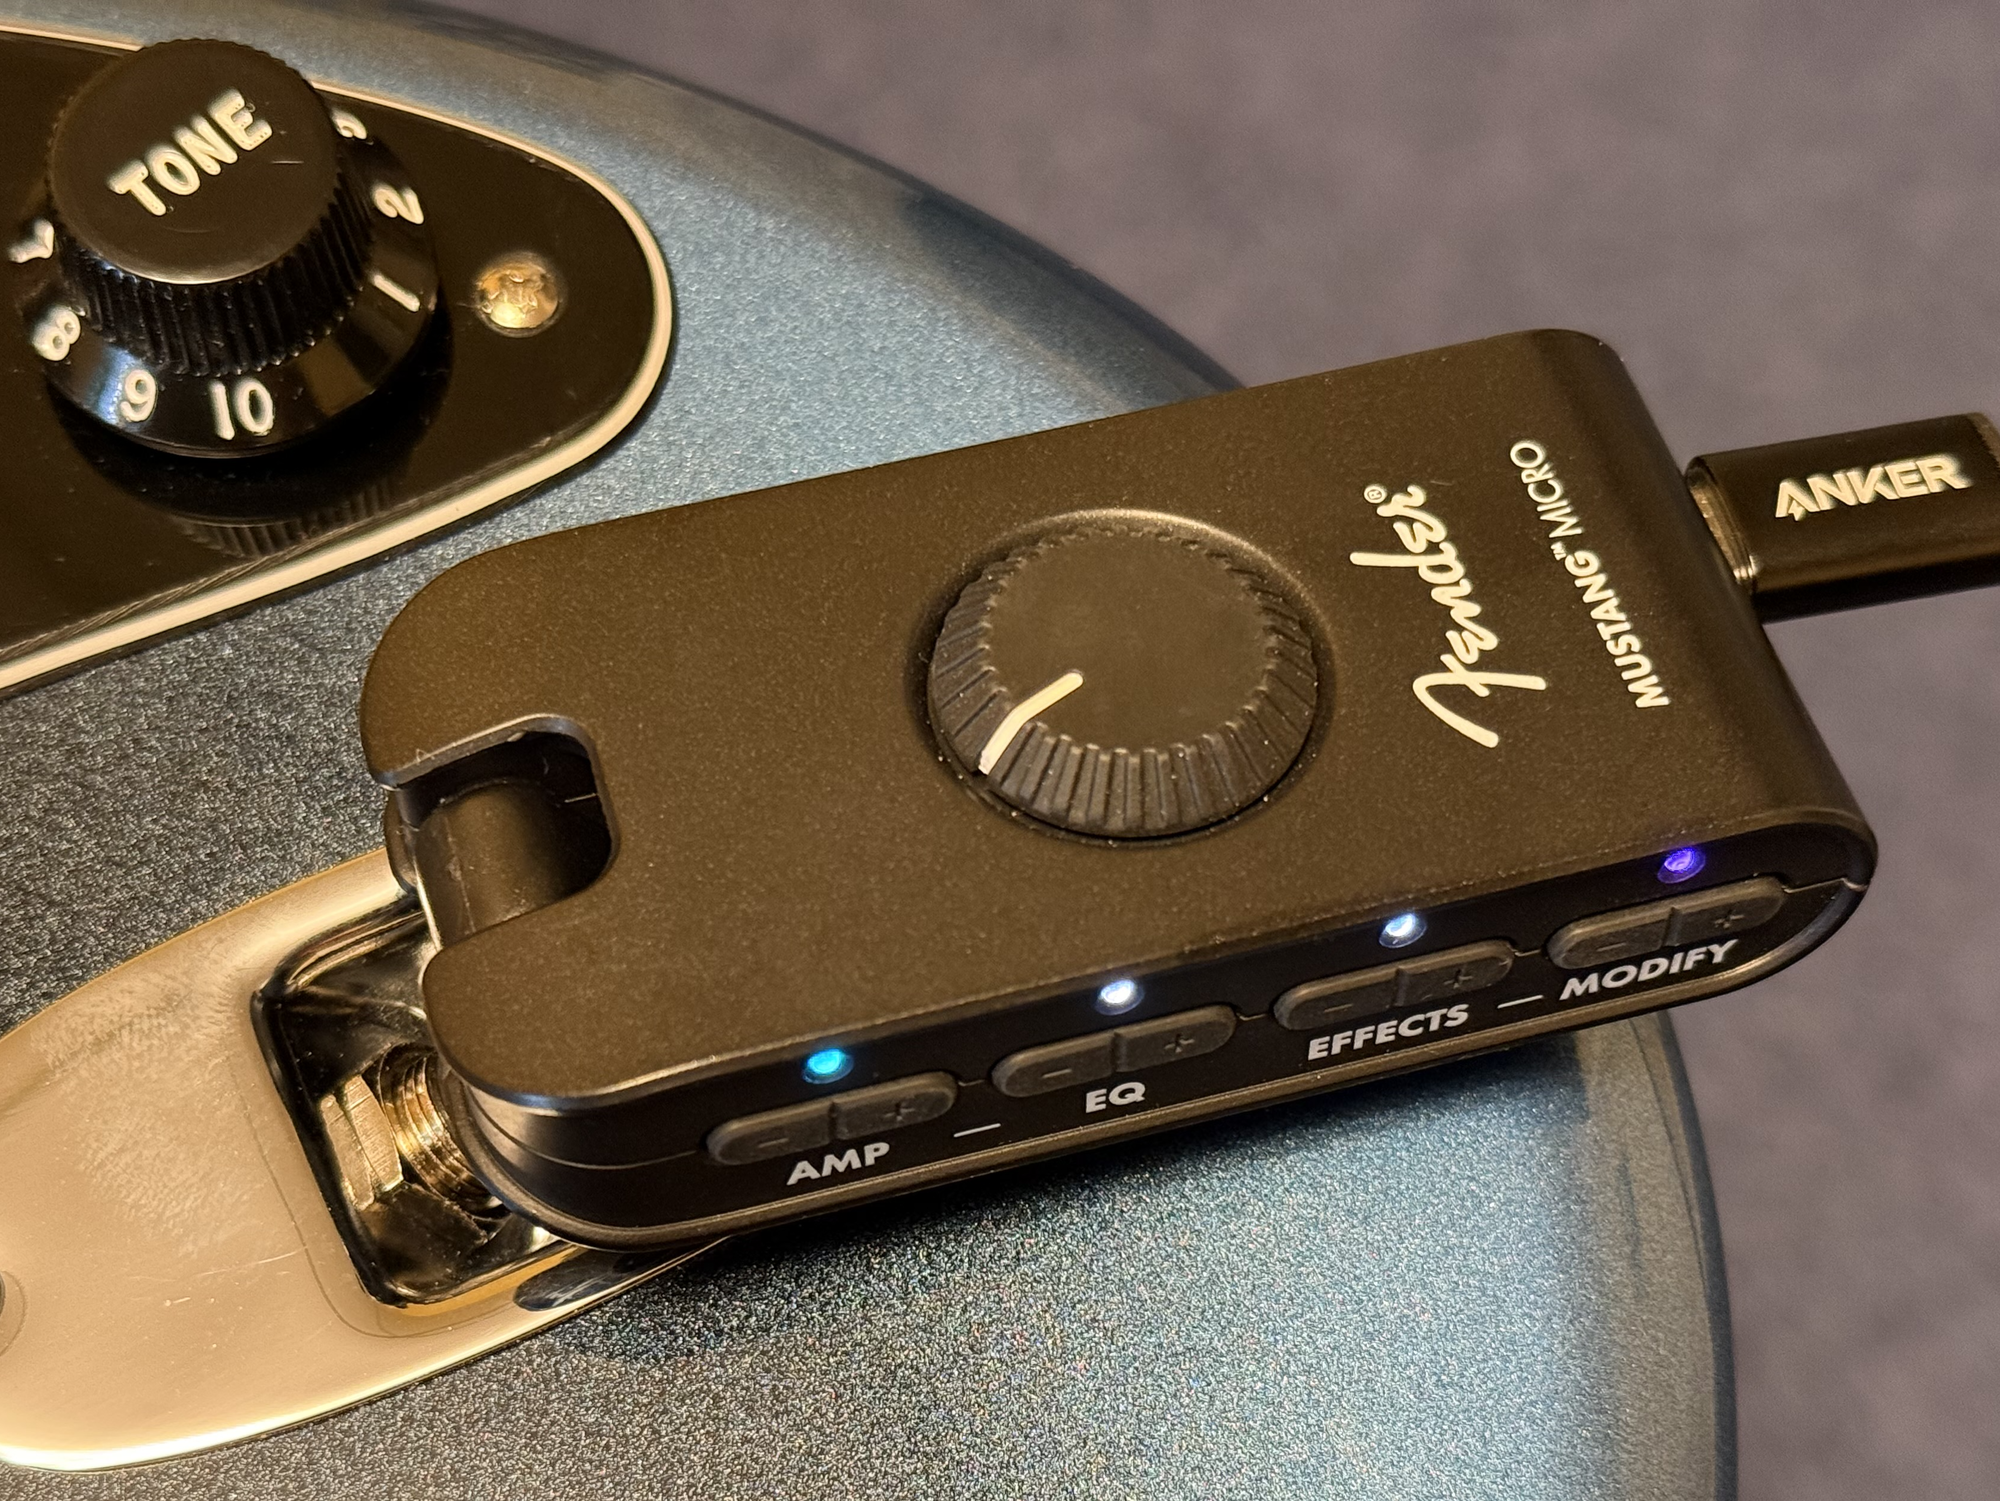
You have two ways to set the guitar tone. The first is to use the Mustang Micro's amp and effects; just be sure to set Logic Pro to be the most basic clean amp with no pedals so that the tone comes only from the Mustang. The second is to set the Mustang Micro amp to the cleanest tone, then use the Logic Pro patches to set the amp and effects; there are more options this way, so I recommend this. To get a clean tone from the Mustang Micro, the lights should be cyan, white, white, and violet. These correspond to a studio preamp, flat EQ, large hall effects, and bypass the effects.
Connecting to Logic Pro on the Mac
For Logic Pro on my MacBookPro, it’s a little tricky because I have only two USB-C ports and because my hard drive space is so limited I store Logic Pro’s Sound Library on an external SSD. Here’s how I make the connections:
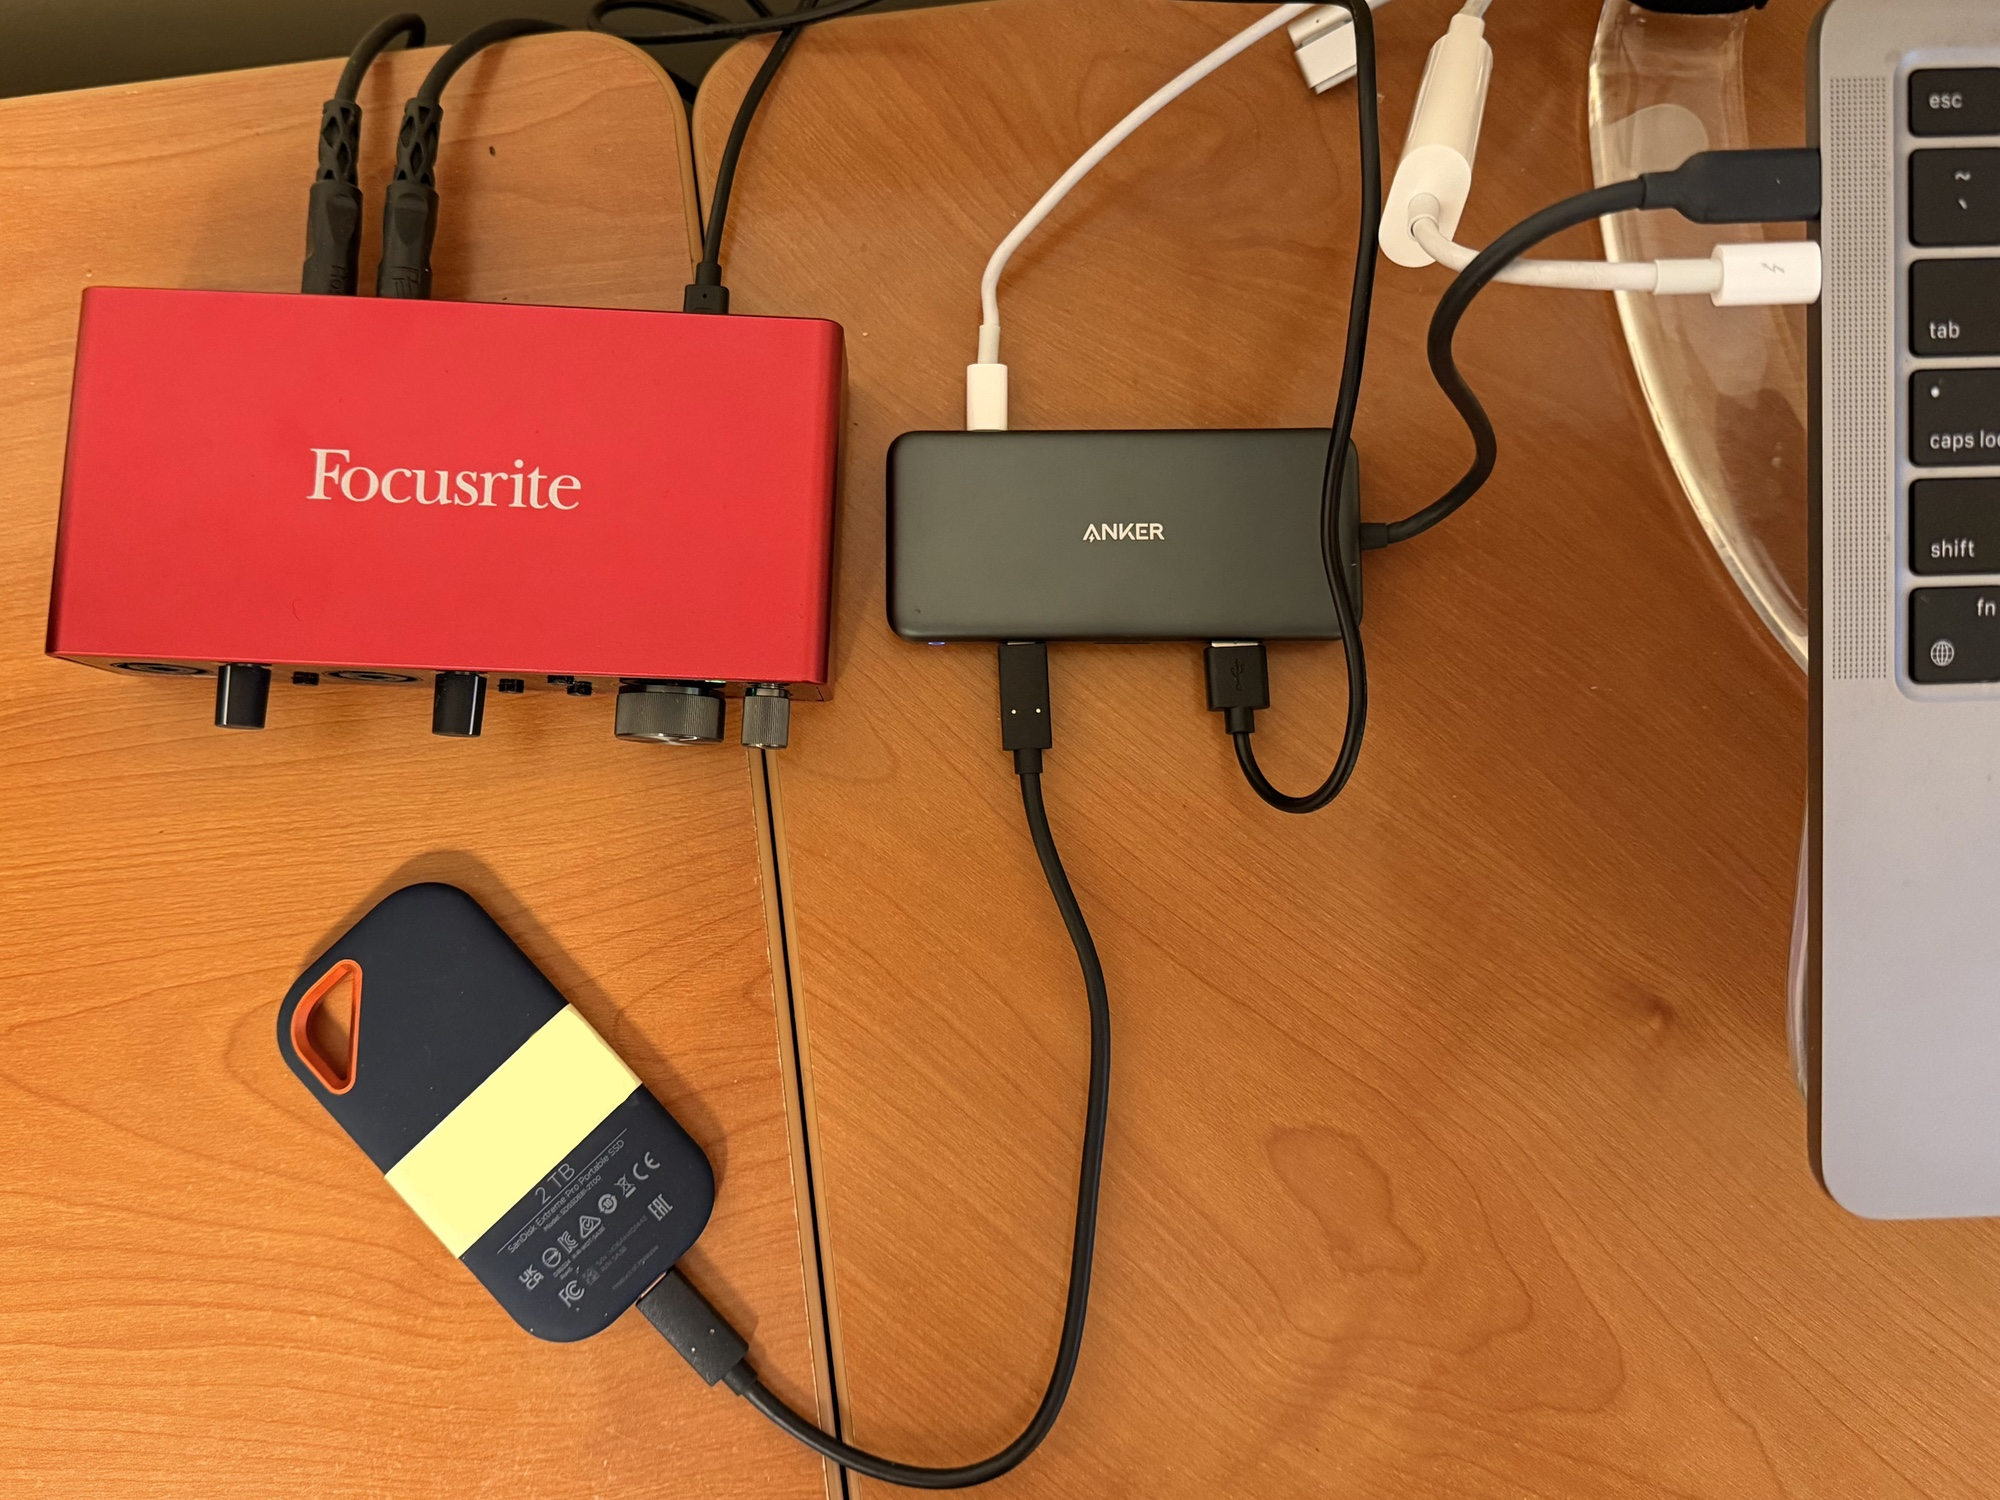
Connect the USB-C power from the wall to the Anker Hub (the port labelled PWD). Plug the external SSD’s USB-C cable into the Anker Hub. Connect the Scarlett 2i2 to the Anker Hub with a USB-C to USB-A cable (the A end goes into the Anker Hub). Plug the Anker Hub’s USB-C cable into the Mac. Plug the guitar into the 2i2 audio interface, and everything should work like the iPad setup.