Acetate Peels
The first step to revealing the internal structure is making a thin section or an acetate peel. A thin section is a thin slice of a bryozoan mounted on a glass slide and viewed under a microscope. Preparing thin sections produces excellently detailed images, but the techniques are relatively difficult and can require expensive equipment. Making acetate peels is much easier and much cheaper.
Acetate peels are made by polishing a surface of a bryozoan, etching it with acid to give it some relief, and then chemically melting a piece of acetate onto that surface. The acetate is then pulled off the bryozoan and is examined under a microscope. In essence, the acetate preserves a fingerprint of the internal structure of the bryozoan.
Be sure to watch the YouTube video that my students, Leanne Hancock and Jordan Carney, put together on how to make acetate peels.
1. Gather your materials. You will need the following:
- abrasive grits in several sizes (we use 120, 600, and 0.3–1.0 μm polishing grit)
- glass plates (one for each size of grit)
- dilute hydrochloric acid (2%)
- acetate sheets
- acetone
- rubber gloves, safety goggles, and forceps
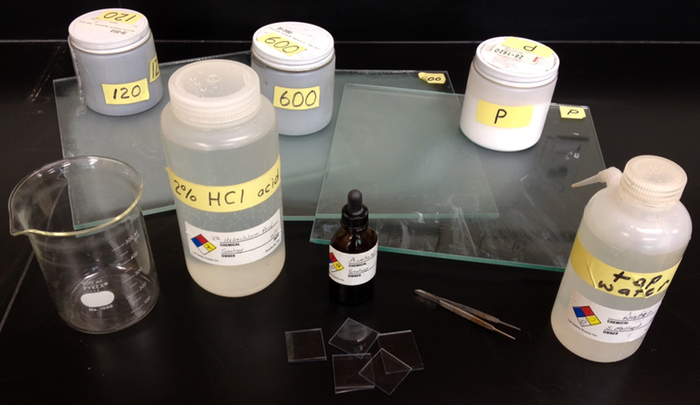
Equipment for making acetate peels.
Abrasive grits can be purchased from Ward's Natural Science. Glass plates can be cut in 12-inch squares at a local glass shop. For acetate sheets, we prefer relatively thick acetate (.06 inches), which we have purchased from K-mac Plastics. Acetate comes in large sheets, which we trim to size with a sharp utility knife and a metal straightedge. This acetate is too thick to cut through completely, so we score it with a knife, then gently flex the sheet until it breaks smoothly along the cut.
2. Polish the bryozoan to a mirror finish. First, make a slurry of water and your coarsest grit in the center of a glass plate. Grind the bryozoan in a circular or figure-eight motion to the desired thickness. Rinse the bryozoan thoroughly under warm water to remove all the grit. A gentle scrub with a clean toothbrush can help loosen the grit. Polish with the next finest grit on a different glass plate. Finally, wash the specimen, and polish it with the finest grit on a different glass plate.
3. Etch the polished surface in weak acid. Using rubber gloves, safety goggles, and forceps, hold the polished bryozoan in dilute hydrochloric acid for 20 seconds to etch the polished surface. Rinse with water and let dry thoroughly. Etching should be done under a fume hood or in a well-ventilated place as the vapors are corrosive and potentially hazardous.
4. Make the acetate peel. Flood the etched surface of the bryozoan with acetone, then cover with a cut piece of acetate. Work quickly, as the acetone evaporates rapidly, but avoid getting air bubbles trapped under the acetate. Once the acetate touches the bryozoan, do not press on it or shift it laterally - this will destroy the peel. Wait a few minutes, then snap the acetate away from the bryozoan, and examine the peel under the microscope. Do not twist the peel off the bryozoan, as that will damage the peel.
Three types of peels
Because a bryozoan is a three-dimensional structure, three types of peels are needed to see this structure completely. With practice and experience, you may not need all three to identify the bryozoan.
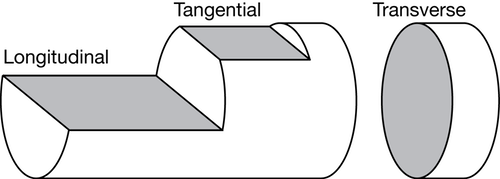
The three most common peel orientations, shown for a ramose bryozoan.
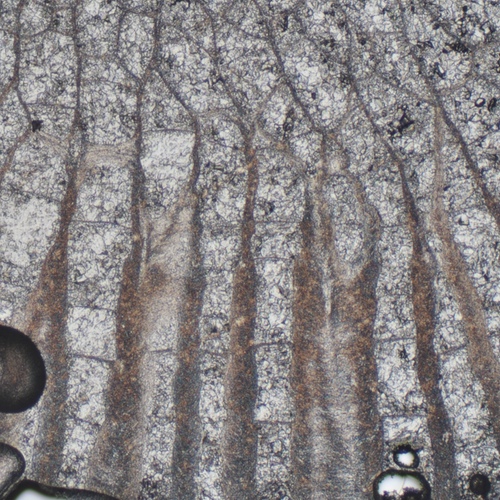
Longitudinal peels are made parallel to the growth direction of the bryozoan. For ramose bryozoans, longitudinal peels are parallel to the branch. Longitudinal peels allow you to see cross-sections along the length of zooecia, from their origin in the endozone to their emergence at the surface of the colony.
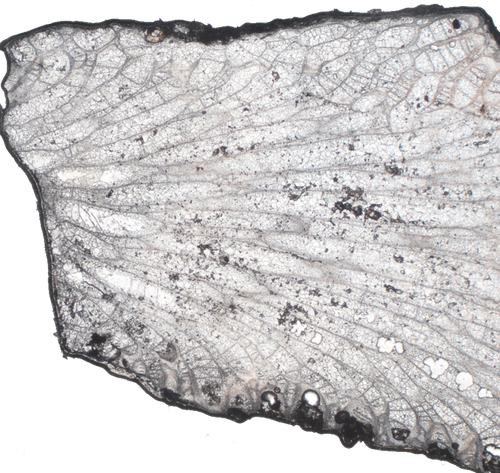
A longitudinal peel through Parvohallopora.
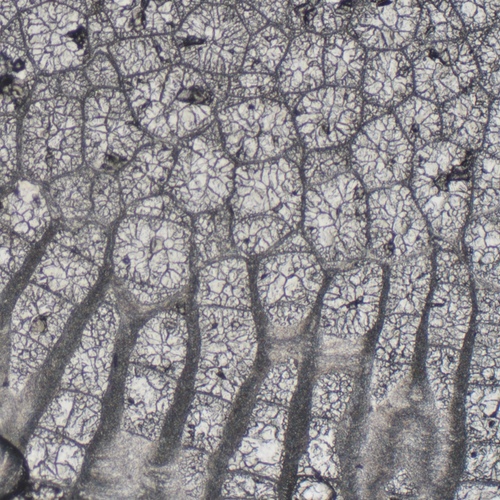
Tangential peels are made parallel to the surface of the bryozoan, but just barely knick the surface. A few seconds of 600 grit followed by polishing compound will likely be all that is needed. Tangential peels allow you to see cross-sections across zooecia near the surface of the bryozoan.
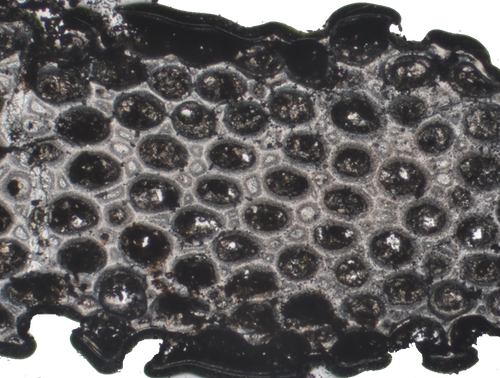
A tangential peel through Parvohallopora.
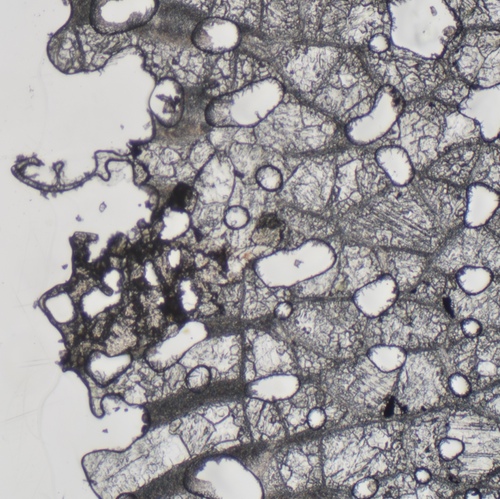
Transverse peels are made perpendicular to the growth of a bryozoan. For a branching or ramose bryozoan, this is a cut perpendicular to the branch. Tangential peels allow you to see cross-sections along zooecia near the surface of the bryozoan (in the exozone) and across zooecia in the center of the bryozoan (in the endozone).
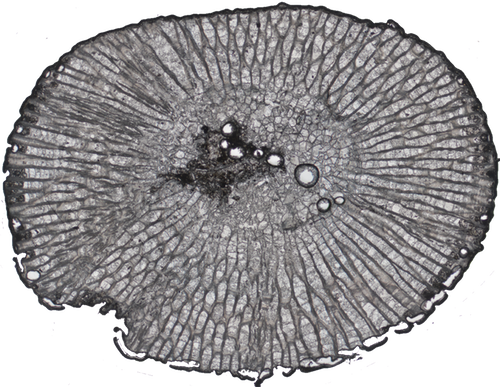
A transverse peel through Amplexopora.
Tips
Wash away all grit. If you don't remove all the grit before proceeding to the next finer grit, the few remaining pieces will produce scratches on your otherwise polished surface. You can often feel these pieces of coarse grit while grinding your specimen, and if you do, wash all the grit off your glass plate and start with new grit. Having a dedicated glass plate for each grit helps to prevent this contamination. It is especially important to wash away the polishing grit before etching and peeling. If grit remains during the etch, it can protect the surface from the acid, giving a poor etch. If it still remains during the acetate/acetone step, it will often embed itself into the acetate and the peel might be so bad that it is unusable. If you ever see a dirty halo around your peel, you have not cleaned off all the grit. We use a clean toothbrush to gently clean our specimens under warm running water to make sure all the grit is removed.
Use polishing grit. Coarse grits are necessary for quickly removing large amounts of material, such as is often needed for longitudinal peels. Finer grits, though, allow for better resolution of fine structural details, and finishing with polishing compound is critical. We have had good results with both 3.3 micron cerium oxide and 6 micron aluminum oxide polishing compounds.
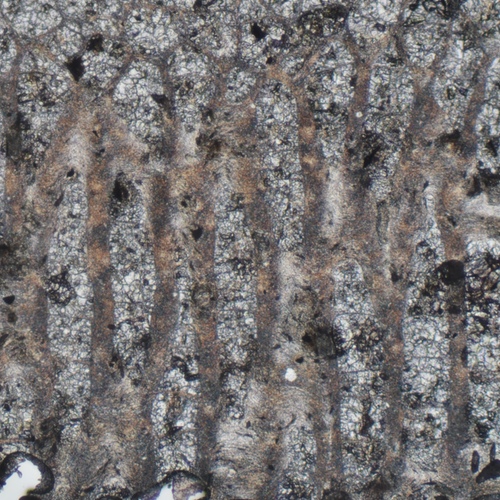
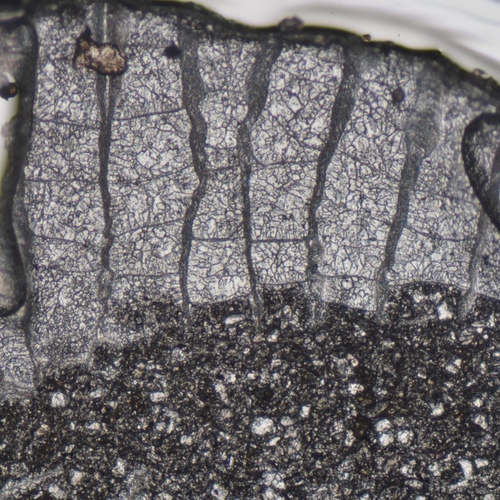
Compare the poor detail when polishing compound is not used (left) to when it is (right).
Allow sufficient etching time. The acid etch is important because it selectively dissolves the polished surface, creating the relief necessary to preserve surface detail. The length of etching time will depend on the type and strength of acid, as well as the preservation of the sample, so some experimentation may be needed to obtain the best results. We have found that a 20–40 second etch for 2% hydrochloric acid gives good results. Some of our colleagues prefer formic acid over hydrochloric acid, and they report that it better preserves fine details.
Compare the poor detail for a 5-second etch (left) to that of a 20-second etch (right).
Apply the acetate quickly but carefully. The acetone will dry quickly, so you must have the acetate ready to apply as soon as the acetone goes on. If you wait too long and the acetone partially evaporates, your peel will have a ragged edge and many air bubbles. If you allow the acetate to evaporate almost entirely, the acetate cannot properly melt onto the surface of the bryozoan and the peel will be unusable. If you simply drop the acetate onto the bryozoan, you will likely trap air bubbles, giving a poor peel. Likewise, if you press or push on the acetate once it is on the bryozoan, you will produce streaks on the peel, making it unusable.
If you wait too long to place the acetate, the peel will have a ragged edge and numerous bubbles.
Allow the acetate to dry before removing. For small peels, the acetate will dry entirely within a few minutes, but can take half an hour or more for larger peels. If you try to remove it too soon, the acetate will be visibly sticky and you will destroy the surface detail as you remove it. When you remove the peel, it should snap off easily if the acetate is dry.
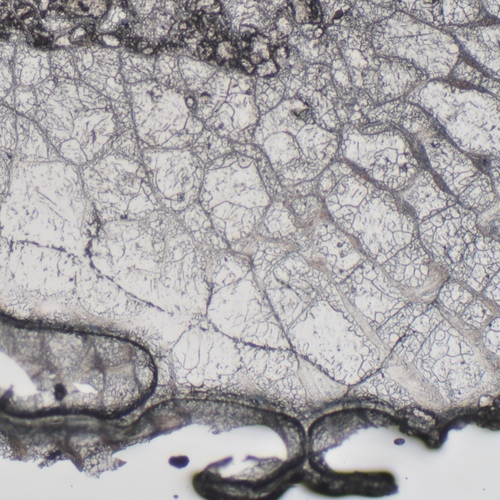
If you remove the acetate too soon, the peel will lack detail and have a bubbly edge.
References
Boardman, R. S. and J. Utgaard, 1964. Modifications of study methods for Paleozoic bryozoa. Journal of Paleontology 38(4): 768–770.
