SSH INTO A HEADLESS RASPBERRY PI
04/21/2017
In my latest explorations of the Raspberry Pi, my goal is to use its GPIO pins as a sensor and report the results on a web page, combining the capabilities of the Pi’s. In this post, I set up my Pi to run headless, that is, without a monitor, keyboard, and mouse. To do that, I’ll need to access it through secure shell.
In the past week, I’ve upgraded from my Pi B+ to a Pi 3, and I’ve switched from Raspian to Ubuntu. This combination gives me a much faster Pi and the ability to use Swift’s package manager, which will simplify some of my steps in the future, both using the GPIO pins and running a web server.
Using secure shell to access the Pi involves three steps: enabling internet sharing on the Mac, enabling SSH on the Pi, and connecting from the Mac to the Pi over SSH.
Enable Internet Sharing over Ethernet on the Mac
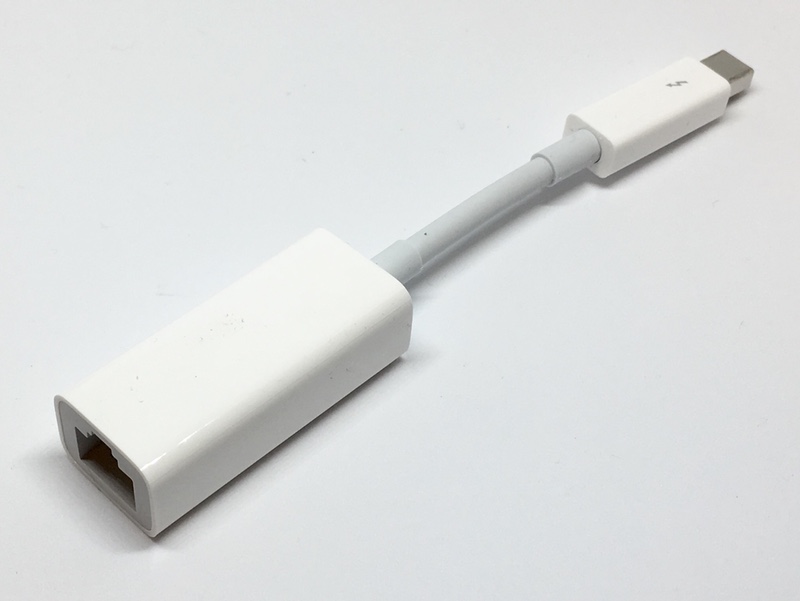
This first step is optional. In the future, I will access the Pi over wi-fi, but while I’m in development, I will use several wifi networks, making a direct ethernet connection to the Pi simpler. My MacBook Pro lacks an ethernet cable, so I will also be using Apple’s Ethernet to Thunderbolt adaptor.
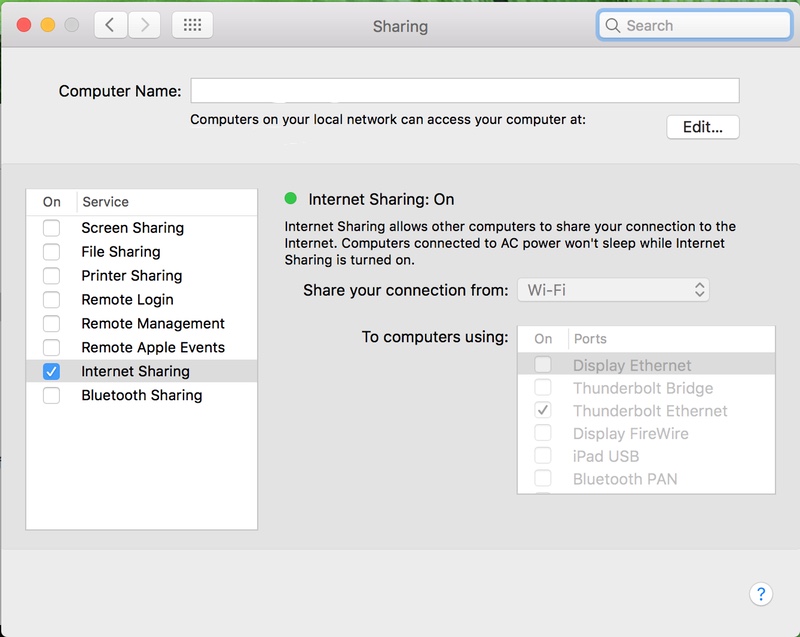
To access the Pi through the Ethernet cable, you will need to enable internet sharing on the Mac. To do this, open System Preferences on the Mac, and tap on Sharing. Check the box next to Internet Sharing, select Wi-Fi for "Share your connection from", and check Thunderbolt Ethernet. If you have an Ethernet port on your Mac, you will check Ethernet instead.
Enable SSH on the Raspberry Pi
The Pi now needs to be set up so that it launches the SSH server on startup. Plug in the Raspberry Pi to start it up, log in, and in the Pi’s terminal, type:
raspi-config
Using the return and arrow keys, navigate the raspi-config menus to Advanced Options, then SSH, and Enable SSH. Save your changes and quit raspi-config. Shut down the Raspberry Pi.
SSH from the Mac to the Raspberry Pi
For the first tests of SSH, we will verify that it works while the Pi still has a keyboard and monitor, which will give us a safe way to quit or restart it if need be. First, with the Pi turned off, plug one end of the Ethernet cable into the Pi and the other end into the Mac via the Thunderbolt adaptor. Start the Pi and wait a minute for it to boot fully.
Connecting to the Pi will require first finding its IP address, and then making the SSH connection. On the Mac, open the Terminal and type:
cat /private/var/db/dhcpd_leases
This generates an output something like what is shown below, where name is the name you have given to your Raspberry Pi.
{
name=pi3
ip_address=192.168.2.2
hw_address=1,b8:27:eb:65:a3:c4
identifier=1,b8:27:eb:65:a3:c4
lease=0x58fa8f49
}
The important part here is the IP address of the Pi. With this and your user name on the Pi (straton for me), attempt to connect via SSH by typing something similar to the following in the Terminal (on the Mac):
ssh straton@192.168.2.2
It will ask for your Pi password, and if this is correct, you will see a prompt corresponding to your user name on the Pi.
Test the SSH connection
The next step is to test the connection to the Pi in the SSH session. Here, I am using the GPIO setup from my last post, which allows me to turn on and turn off an LED with three commands. The first declares GPIO pin to be for output, the second lights up the LED, and the third turns it off. When you are finished, try shutting down the Pi with the shutdown command. On the Mac, you should see that the SSH session is terminated, and the LEDS on the Pi should indicate that is powered off.
gpio -g mode 17 out
gpio -g write 17 1
gpio -g write 17 0
sudo shutdown -h now
Finally, disconnect the monitor, keyboard, and mouse from the Pi to make it headless. Start up the Pi by powering it on, then try connecting via SSH on the Mac, repeating the commands from above. It should all work as before: you now have a direct SSH connection to your Pi.
More options
All of this assumes that you want to interact with your Pi only through the Terminal. It’s also possible to share the Pi’s screen using a VNC connection, and Interlock Rochester has a good guide for setting this up. They were also the best guide for me in getting the SSH connection set up.